
Makeup
Custom Fan Controller For Otherwise Fanless PCs
Jun
Fanless PCs are the introverts of the computer world: quiet, compact, efficient, and usually happiest when nobody asks them to render a 4K timeline, run a dozen Docker containers, or survive inside a cabinet with the airflow personality of a shoebox. Their appeal is obvious. No fan means no whine, no dust-blasting intake, fewer moving parts, and a desktop that does not sound like a tiny leaf blower auditioning for a landscaping crew.
But “fanless” does not mean “heatless.” A passive cooling system still has to move heat away from the processor, storage, voltage regulators, memory, and case. It simply does that with heatsinks, heat pipes, thermal pads, aluminum chassis fins, and the surrounding air. That works beautifully for low-power workloads. It gets trickier when the workload becomes sustained, the room gets warm, the mini PC sits behind a monitor, or the device spends its life tucked into an entertainment center next to a router, NAS, and power brick stew.
That is where a custom fan controller for otherwise fanless PCs becomes interesting. Instead of turning a silent PC into a permanently noisy one, a smart controller adds airflow only when the machine actually needs help. Think of it as a polite cooling assistant: invisible most of the time, useful during thermal drama, and far less annoying than a fan running full blast because one browser tab remembered it had JavaScript.
What Is a Custom Fan Controller for a Fanless PC?
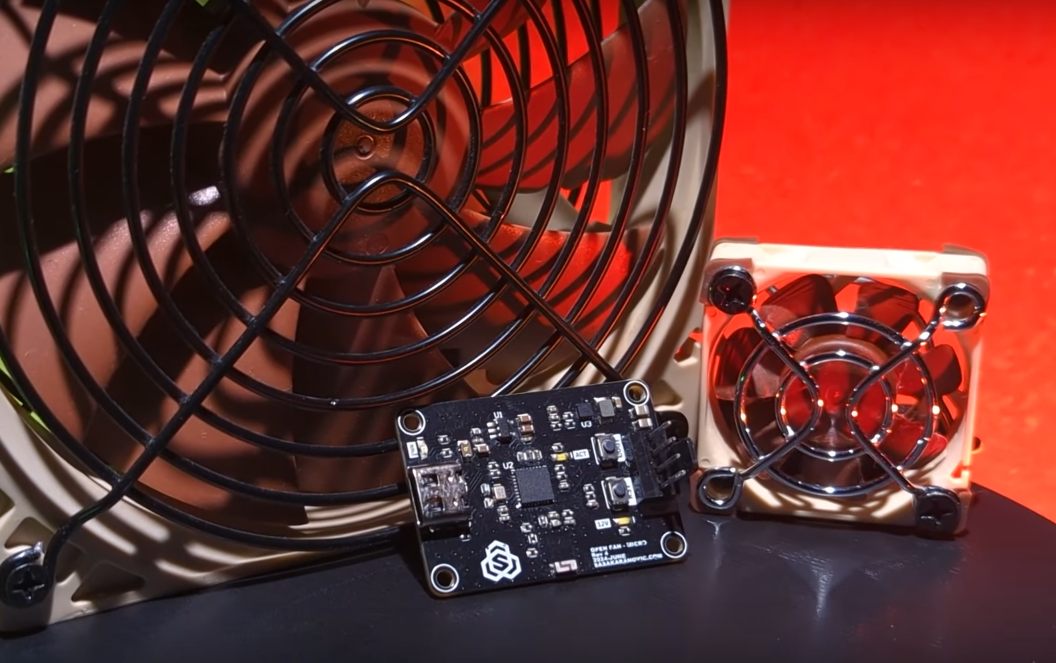
A custom fan controller is a small hardware and software system that monitors temperature and controls one or more external or internal fans. In the context of otherwise fanless PCs, the controller is usually added outside the original thermal design. It may sit in a 3D-printed bracket, attach to a heatsink, mount under a desk, clip to a mini PC enclosure, or live in a small electronics box connected by USB power.
The controller can be simple or delightfully over-engineered. A basic version might use a thermistor and a transistor to turn on a 5V fan when the case reaches a set temperature. A more advanced version may use a microcontroller such as an Arduino, ESP32, Raspberry Pi Pico, or similar board. That setup can read digital temperature sensors, generate PWM fan signals, track fan RPM through tachometer feedback, serve a web dashboard over Wi-Fi, and apply a smooth fan curve that keeps noise low.
The goal is not to defeat the idea of a fanless PC. The goal is to preserve silence during normal use while preventing heat soak during heavier workloads. In other words, it is not “fanless purity” versus “fan chaos.” It is more like hybrid cooling with manners.
Why Fanless PCs Sometimes Need a Little Help
Fanless computers rely on passive cooling. Heat moves from chips into heatsinks, from heatsinks into the chassis, and from the chassis into surrounding air. That chain depends heavily on surface area, thermal contact quality, ambient temperature, and airflow around the device. A ribbed aluminum case can do a great job on an open desk. The same case may struggle when shoved behind a TV, stacked under another warm device, or placed in a dusty cabinet with the thermal optimism of a closed lunchbox.
Modern processors protect themselves through thermal management. When they approach their thermal limits, they may reduce clock speed, voltage, or power draw. This protects hardware, but it can also create sluggish performance. A fanless mini PC that feels snappy for five minutes may slow down after twenty minutes of compiling code, hosting virtual machines, exporting video, gaming lightly, or running security camera software.
Passive systems are excellent for predictable low-power tasks: office documents, digital signage, network appliances, point-of-sale terminals, audio playback, lightweight home servers, and industrial control. They are less magical when asked to sustain high CPU or GPU loads indefinitely. Physics remains stubborn. Heat still needs somewhere to go, and “somewhere” should not be “into the poor SSD until it questions its career choices.”
The Smart Middle Ground: Fans That Stay Off Until Needed
The beauty of a custom fan controller is that it can keep fans off most of the time. A quiet 80 mm, 92 mm, or 120 mm fan placed near a passive chassis can provide a surprising boost when temperatures climb. It does not need to scream. Even slow airflow over external fins can help remove the warm boundary layer that builds up around a passive heatsink.
Many fanless PC owners discover that a low-speed external fan is quieter than expected because larger fans can move useful air at lower RPM. A tiny internal blower often sounds sharp and irritating. A larger external fan at 400 to 700 RPM can be almost inaudible in a normal room while still improving thermal stability. The difference is like comparing a mosquito with a ceiling fan. Both move air, but only one makes you question your life decisions at midnight.
A controller adds intelligence. Rather than wiring a fan to run constantly from USB, it can watch temperature and respond gradually. For example, the fan might remain off below 45°C, start gently at 50°C, ramp up at 60°C, and reach higher speeds only during sustained heat. This keeps the system silent during light work and protects performance during demanding tasks.
Core Components of a DIY Fan Controller
1. Temperature Sensor
The controller needs temperature data. Common choices include digital sensors such as DS18B20 probes, thermistors attached to the case, I2C sensors, or readings pulled from the operating system. External sensors are easy to place on the heatsink or chassis. Software readings from CPU sensors are more precise for processor temperature but require the controller to communicate with the PC.
A practical setup often uses both. A case-mounted sensor reacts to the thermal mass of the enclosure, while CPU temperature gives early warning during sudden workloads. If the CPU jumps from cool to spicy in seconds, the controller can respond before the metal shell catches up.
2. Microcontroller
A microcontroller provides the brain. Arduino boards are friendly for beginners. ESP32 boards add Wi-Fi and enough processing power for a web interface. A Raspberry Pi Pico is affordable and capable for PWM control. The controller does not need a supercomputer; it just needs to read sensors, apply logic, and output a control signal. This is one of those rare tech projects where “tiny brain, big responsibility” is a compliment.
3. PWM Fan Output
Most modern PC fans use either 3-pin voltage control or 4-pin PWM control. A 4-pin PWM fan receives constant power while its speed is controlled through a separate pulse-width modulation signal. The common PC PWM standard uses a high-frequency control signal, often around 25 kHz, which helps avoid audible clicking and allows smoother speed control.
A good controller should respect the electrical behavior of PC fans. Many 4-pin fans expect an open-drain or open-collector style PWM signal rather than a direct push-pull output. In plain English: do not casually blast a fan’s control pin with the wrong voltage and hope friendship solves the problem. Use the right transistor or MOSFET circuit, share ground properly, and verify the fan’s pinout.
4. Tachometer Feedback
The tachometer wire reports fan speed. Reading RPM is useful because fans do not always spin reliably at extremely low duty cycles. A controller can briefly boost power to start the fan, then reduce speed once it is spinning. It can also detect fan failure and trigger an alert. That matters if the fan is protecting a home server, router appliance, NAS box, or mini PC that runs unattended.
5. Power Supply
Fans may use 5V, 12V, or occasionally other voltages. Small USB fans are convenient, but many PC case fans are 12V. A controller should supply enough current for startup, not just steady running. Fan startup current can be higher than running current, so build in margin. For multiple fans, use a dedicated power supply or a proper DC adapter rather than stealing power from a fragile USB port and hoping it has the emotional resilience.
Designing a Quiet Fan Curve
A fan curve maps temperature to fan speed. The trick is to avoid sudden changes. Humans are surprisingly good at noticing ramping noise, especially in quiet rooms. A fan that slowly moves from 30% to 40% speed is easy to ignore. A fan that jumps from off to full speed sounds like a tiny drone just remembered its destiny.
A good fan curve for an otherwise fanless PC might look like this:
- Below 45°C case temperature: fan off
- 45°C to 55°C: fan starts at low duty cycle
- 55°C to 65°C: fan ramps gradually
- 65°C to 75°C: fan becomes more assertive
- Above 75°C: fan runs high and optionally sends an alert
The exact numbers depend on the device, sensor placement, processor, workload, and ambient temperature. For CPU-based control, thresholds may be higher because internal chip temperatures naturally run hotter than the outside case. For SSD or enclosure sensors, lower thresholds may be appropriate.
Add hysteresis to prevent fan chatter. Hysteresis means the fan does not turn on and off at the same exact temperature. For example, it might turn on at 50°C and stay on until the temperature drops below 45°C. Without hysteresis, a fan near the threshold can click on, off, on, off, on, off, and now your silent PC has become a confused cricket.
Where to Put the Fan
Fan placement matters as much as fan speed. A fanless PC case is usually designed to radiate and convect heat from its external surfaces. The best cooling improvement often comes from moving air across the hottest fins or broadest metal surface. Blowing directly at the case can work. Pulling air through a fin channel can work. Creating gentle crossflow around the entire enclosure can also work.
Avoid blocking the heatsink fins with a bracket that looks clever but traps heat. Leave space for air to enter and exit. If the PC is mounted vertically, natural convection may already help; the fan can assist that direction instead of fighting it. If the PC is horizontal, lifting it slightly with rubber feet or a stand may improve airflow before a fan is even added.
For mini PCs behind TVs or monitors, a slim 5V or 12V fan can be mounted to blow across the chassis. For network appliances, a slow 120 mm fan under or beside the enclosure can cool the whole box. For industrial fanless computers, external airflow may be used only during extreme ambient conditions or high-load periods, preserving the sealed design as much as possible.
Software Control vs. Independent Hardware Control
There are two main approaches: software-assisted control and independent hardware control.
Software-assisted control reads the PC’s internal sensors through tools such as system monitoring utilities, Linux hardware sensor interfaces, or custom scripts. This can be very accurate because the controller can react to CPU, GPU, SSD, and motherboard temperatures. The drawback is dependence. If the operating system hangs, sleeps, crashes, or stops the monitoring service, the fan controller may lose its temperature source.
Independent hardware control uses local temperature sensors connected directly to the microcontroller. It works even when the PC is booting, frozen, or offline. The drawback is that external sensors may lag behind internal chip temperature. The ideal setup combines both: local sensors for reliability and software data for responsiveness.
Safety Considerations Before You Start Soldering
A custom fan controller is not difficult, but it deserves respect. Always confirm voltage, polarity, current limits, and fan wiring before connecting parts. Use a fuse or current-limited supply where appropriate. Insulate exposed terminals. Keep wires away from hot surfaces. Do not attach conductive parts to a metal chassis without checking for shorts. Do not block vents, fins, or wireless antennas.
Also remember that modifying hardware can void warranties. External cooling is usually safer than opening a sealed mini PC. If your fanless system is used in a business, industrial, medical, or mission-critical setting, use certified hardware and follow the manufacturer’s thermal guidelines. DIY cooling is fun; explaining to a client that the server failed because of “experimental zip-tie aerodynamics” is less fun.
Best Use Cases for a Custom Fan Controller
Home Lab Servers
Fanless mini PCs are popular in home labs because they are compact and quiet. They often run Proxmox, Docker, Home Assistant, pfSense, OPNsense, media servers, or development environments. These workloads can vary dramatically. A smart fan controller can stay silent during idle hours and help during backups, updates, indexing, or virtual machine activity.
Media Centers
A fanless media PC in a living room should stay quiet. But streaming, transcoding, or high-resolution playback can warm up the device. A low-speed fan that activates only during heavier playback can prevent stutter without ruining movie night. Nobody wants the dramatic final scene accompanied by the sound of a tiny vacuum cleaner.
Digital Signage and Kiosks
Digital signage systems often run all day in warm spaces. Fanless designs reduce dust and maintenance, but steady workloads can cause heat buildup. A controlled external fan can extend stability in difficult installations, especially when the PC is mounted behind a display or inside an enclosure.
Audio Workstations
Recording studios love silent computers. However, audio plugins, virtual instruments, and live processing can load the CPU. A custom fan controller allows the system to remain silent during tracking and provide cooling during mixing, rendering, or exporting.
Common Mistakes to Avoid
The first mistake is using a fan that is too small. Tiny fans often need high RPM to move useful air, which creates annoying noise. A larger fan at lower speed is usually better.
The second mistake is setting the fan curve too aggressively. If the fan ramps up for every small temperature bump, the system will feel noisy even if temperatures are safe. Let the passive chassis do its job first, then assist when heat becomes sustained.
The third mistake is ignoring sensor placement. A sensor dangling in open air measures room temperature, not the PC. A sensor stuck on the coolest corner of the case gives false confidence. Place sensors near heat paths, heatsink fins, exhaust-warm zones, or components that actually matter.
The fourth mistake is assuming every fan behaves the same. Some PWM fans stop cleanly at 0% duty cycle. Others keep spinning. Some start reliably at low speed. Others need a startup pulse. Test your fan before building the final enclosure.
Example Build Concept
Imagine a fanless mini PC used as a small home server. It runs containers, file syncing, and a media library. Most of the day, CPU load is low and the aluminum case sits comfortably warm. During media indexing or backups, the case becomes hot and the CPU clocks down.
A practical controller could use an ESP32, a DS18B20 temperature probe attached to the top heatsink fin, a 92 mm 12V PWM fan, and a small web dashboard. The fan remains off below 45°C. At 50°C, the controller sends a startup pulse and runs the fan gently. At 60°C, speed increases. At 70°C, the fan becomes more aggressive and the dashboard shows a warning. If the tachometer reports zero RPM while the controller is requesting airflow, it logs a fault.
The result is still functionally a quiet fanless-style PC most of the time. Under load, it becomes a hybrid-cooled system that protects sustained performance. It is not as pure as passive cooling, but it is far more practical than watching a mini PC politely cook itself into reduced clock speeds.
Maintenance and Long-Term Reliability
One reason people choose fanless PCs is reliability. Fans can fail, collect dust, and make noise over time. Adding a fan reintroduces a moving part, so the design should minimize dependence on it. The PC should remain safe if the fan fails; the fan should merely improve performance and temperature margin.
Use dust filters only if they do not restrict airflow too much. Clean the fan periodically. Choose quality fans with fluid dynamic or magnetic bearings if the system runs often. Use soft mounts to reduce vibration. Keep cables tidy. Log temperatures during real workloads and adjust the fan curve based on evidence, not vibes. Vibes are great for music playlists; they are less reliable for thermal engineering.
Experience Notes: Living With a Custom Fan Controller
The most surprising thing about using a custom fan controller on an otherwise fanless PC is how little airflow is often needed. Many people imagine they need a dramatic cooling solution: brackets, ducts, high-static-pressure fans, maybe a dashboard that looks like it escaped from a spaceship. In practice, a slow, well-placed fan can make the biggest difference. Passive heatsinks already spread heat across a large metal surface. The missing ingredient is often just gentle air movement.
In daily use, the best controller is the one you forget exists. During web browsing, writing, music playback, or light server tasks, the fan should stay off. The computer should behave exactly like the silent machine you bought or built. Then, when the workload ramps up, the fan should start softly enough that you notice the temperature improvement before you notice the noise. That is the sweet spot.
One useful habit is to test the PC in the actual place where it will live. Bench testing on an open desk can be misleading. A fanless PC behind a monitor, under a shelf, inside a media cabinet, or beside a warm router will behave differently. Measure idle temperature, sustained load temperature, and recovery time after the load ends. Recovery time is especially revealing. If a case stays hot long after the CPU load drops, the enclosure is storing heat faster than it can shed it.
Another practical lesson is that fan noise is not only about decibels. Tone matters. A slightly louder low-frequency whoosh may be less annoying than a quieter high-pitched whine. That is why larger fans usually win. A slow 120 mm fan can sound smoother than a tiny 40 mm fan, even if both technically move enough air. Mounting also matters. A fan hard-mounted to a metal case can transmit vibration. Rubber mounts, foam pads, or a separate stand can make the setup feel much more polished.
The controller logic should also be boring in the best possible way. Avoid fancy curves that react instantly to every one-second temperature spike. Thermal mass moves slowly, and your fan curve should respect that. Average readings over several seconds. Add hysteresis. Use a startup pulse for reliability. Set a minimum running speed that keeps the fan spinning smoothly. Then test it during the worst workload you expect, not the easiest one.
There is also an emotional benefit. A custom fan controller gives you control over the tradeoff between silence and performance. Instead of accepting factory behavior, you can tune the system for your room, workload, and tolerance for noise. For a home lab, you may prefer cooler operation and accept a faint fan sound. For a bedroom media PC, you may prefer silence until temperatures are genuinely high. For a studio workstation, you may want a manual “recording mode” that keeps fans off temporarily, then resumes automatic cooling afterward.
The biggest caution is not to treat the fan as permission to overload a passive system forever. A fan controller helps, but it does not rewrite the laws of heat transfer. If the PC regularly needs heavy sustained cooling, an actively cooled machine may be the better tool. But for occasional load spikes, warm rooms, awkward placement, or silent-first setups, a custom fan controller is a wonderfully practical upgrade.
Conclusion
A custom fan controller for otherwise fanless PCs is not a betrayal of silence. It is a smart compromise. Fanless computers are excellent because they remove noise, dust pathways, and mechanical failure points. But they still obey thermal limits, and sustained heat can reduce performance. A thoughtful controller adds cooling only when needed, using temperature sensors, PWM control, fan curves, tachometer feedback, and careful placement to keep the system quiet and stable.
The best designs are simple, safe, and tuned to real workloads. Use a quality fan, place it wisely, avoid abrupt speed changes, and monitor results. Done right, the PC remains silent during everyday use and gains a safety net when heat builds up. It is the computing equivalent of carrying an umbrella: most of the time you do not need it, but when the storm arrives, you look very clever.
Note: This article is written for web publication and synthesizes real technical information from PC cooling standards, fan-control engineering practices, microcontroller projects, processor thermal guidance, and fanless mini PC design references without inserting source links into the article body.
