
Body Care
Vive la France! Build a Tall Wooden Planter
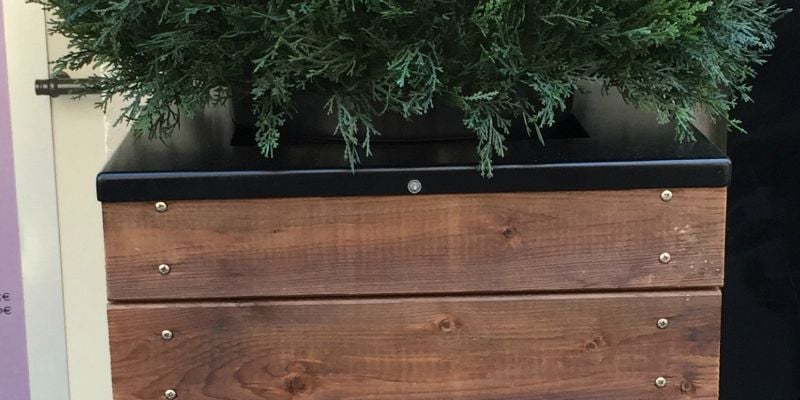
Aug
Some DIY projects whisper. Others arrive wearing a beret, carrying lavender, and announcing, “Vive la France!” A tall wooden planter belongs in the second group. It is practical, elegant, and just dramatic enough to make your patio feel like it has been secretly studying French garden design after dark.
A tall wooden planter is one of the best weekend projects for homeowners, renters, balcony gardeners, and anyone who wants more greenery without committing to a full backyard excavation. It raises plants closer to eye level, improves accessibility, adds vertical interest, and creates a polished focal point for patios, porches, decks, courtyards, and front entries. Even better, it can be built with common lumber, basic tools, and a healthy respect for drainage holes.
This guide walks you through how to build a tall wooden planter with a French-inspired look: clean lines, balanced proportions, simple trim, and enough charm to make a tomato plant feel underdressed. We will cover design planning, wood selection, materials, step-by-step construction, soil, drainage, finishing, planting ideas, maintenance, and real-world experience from tackling this kind of project.
Why Build a Tall Wooden Planter?
A tall planter is not just a box with ambition. It solves several common gardening problems at once. First, it makes gardening easier on your back. Instead of crouching like a suspicious garden gnome, you can tend herbs, flowers, or compact vegetables at a comfortable height.
Second, tall planters are excellent for small spaces. A narrow balcony, townhouse patio, or front porch may not have room for a full raised bed, but it can often handle a vertical planter. The height creates impact without eating up every square foot.
Third, wooden planters bring warmth that plastic containers rarely achieve. Cedar, redwood, cypress, and well-finished exterior lumber can look beautiful outdoors. Add a French-style silhouette, a painted finish, or decorative trim, and the planter becomes part garden feature, part outdoor furniture.
The French Inspiration: Simple, Formal, and Très Chic
The phrase “Vive la France” is not just here for decoration, although it does look excellent in a headline. French garden design often favors symmetry, structure, clipped greenery, repeated forms, and handsome containers. Traditional Versailles-style planters were famously used for citrus trees and formal garden displays, and their influence still appears in square wooden tree boxes, paneled planters, and courtyard containers today.
You do not need a palace, a fountain, or a staff of gardeners named Pierre to borrow the idea. A tall wooden planter with straight sides, square legs, framed panels, and a clean painted or stained finish can capture that formal French feeling on a realistic DIY budget. Think “mini courtyard elegance,” not “I accidentally built an aristocratic citrus museum.”
Best Wood for a Tall Outdoor Planter
The best wood for a tall wooden planter is wood that can handle moisture, sun, and outdoor temperature swings. Cedar is a favorite because it is naturally resistant to decay, relatively lightweight, easy to work with, and attractive even before finishing. Redwood and cypress are also excellent outdoor choices when available.
Pressure-treated lumber can be budget-friendly and long-lasting, especially if the planter is for ornamental plants. If you plan to grow herbs or vegetables, many gardeners prefer cedar, redwood, cypress, or another naturally durable wood to keep the project simple and food-garden friendly. If treated lumber is used, consider lining the interior sides with heavy plastic or another barrier while keeping the bottom open or well-drained so water can escape.
Recommended lumber options
- Cedar: Lightweight, aromatic, attractive, and naturally weather-resistant.
- Redwood: Beautiful and durable, though often more expensive.
- Cypress: Strong outdoor performance and a classic garden look.
- Exterior-grade pine or fir: Affordable, but should be sealed, painted, or stained carefully.
- Pressure-treated lumber: Durable and economical, best used with proper lining if growing edibles.
Suggested Planter Size
For this project, a practical tall planter size is about 18 inches wide, 18 inches deep, and 32 to 36 inches tall. That height is comfortable for many gardeners, visually substantial, and still stable when built properly.
If you want to grow compact flowers, herbs, ornamental grasses, dwarf shrubs, or trailing annuals, this size works beautifully. For deeper-rooted vegetables such as tomatoes, peppers, or small eggplants, increase the planting depth or use a larger interior container. Remember: plants do not care how elegant the planter looks if their roots are living in a cramped wooden apartment.
Tools and Materials
Tools
- Miter saw or circular saw
- Drill and driver bits
- Tape measure
- Speed square
- Clamps
- Sander or sanding block
- Staple gun
- Paintbrush or stain pad
- Safety glasses and hearing protection
Materials
- Four 2×2 or 4×4 boards for legs
- 1×4 cedar boards or fence pickets for side panels
- 1×2 trim boards for the top and panel frames
- Exterior wood screws
- Wood glue rated for exterior use
- Landscape fabric
- Hardware cloth or mesh for the bottom support
- Exterior stain, paint, or spar urethane
- Potting mix or raised bed mix
- Compost
- Optional: casters, finials, decorative molding, or a trellis
Step-by-Step: How to Build a Tall Wooden Planter
Step 1: Choose the location before you build
Before cutting a single board, decide where the planter will live. This matters because a filled planter can become surprisingly heavy. Soil, water, and wood team up like a tiny gym membership you did not ask for.
Place the planter where it gets the right light for your plants. Herbs such as rosemary, thyme, basil, and lavender prefer plenty of sun. Shade-loving annuals and foliage plants need a softer location. Also check whether water draining from the planter could stain a deck, balcony, or patio surface.
Step 2: Cut the legs
Cut four legs to the same length, usually between 32 and 36 inches. If you want a chunkier, more formal look, use 4×4 posts. For a lighter planter, 2×2 legs work well. Sand the cut edges so they are smooth and less likely to splinter.
For a French-inspired touch, add small wooden finials to the top corners or use slightly thicker legs to mimic the sturdy proportions of classic tree boxes.
Step 3: Build the side frames
Each side of the planter needs a frame. Cut top and bottom rails from 1×2 or 1×4 boards, then attach them between the legs with exterior screws. Build two opposite sides first, then connect them with the remaining rails to create a square or rectangular frame.
Use a square as you assemble. A planter that starts crooked tends to stay crooked, and by the time you notice, it will look like it is trying to leave the patio.
Step 4: Add the side panels
Cut cedar boards, fence pickets, or 1×4 slats to fit inside or over the side frames. Attach them with exterior screws or brad nails rated for outdoor use. Leave tiny gaps between boards if you want a rustic look and better airflow, or fit them tightly for a more refined paneled style.
For a classic French look, create framed panels: vertical boards in the center with narrow trim around the edges. Painted black, deep green, warm white, or soft gray, this design can look surprisingly high-end.
Step 5: Create the bottom support
A tall planter does not need to be filled from the very bottom with soil unless you are growing plants with deep roots. In many cases, you can install a shelf or support grid about 12 to 16 inches below the top rim. This reduces weight and saves potting mix.
Use sturdy slats, hardware cloth, or an open wooden grid as the base. The bottom support should hold soil or a nursery pot while allowing water to drain. Do not seal the bottom into a waterproof bathtub unless you are trying to grow regret.
Step 6: Add drainage
Drainage is the difference between a thriving planter and a fancy swamp. Containers need holes or open pathways so excess water can leave and air can reach plant roots. If you install a solid wooden bottom, drill several evenly spaced drainage holes. If you use an open grid, drainage is already built into the design.
Raise the planter slightly on feet, blocks, or casters so water can move out freely. This also helps protect decks and patios by improving airflow underneath the planter.
Step 7: Line the inside
Staple landscape fabric inside the planter to hold soil while still allowing water to pass through. For a planter that uses a removable plastic nursery pot, you can skip the full fabric lining and simply drop the pot into the frame.
Avoid blocking drainage holes with plastic. If you use a plastic liner along the sides to protect the wood, cut generous drainage openings at the bottom. The goal is to protect the planter, not create a rain-filled soup bowl with petunias floating in it.
Step 8: Sand and finish the exterior
Sand rough edges and corners. Then apply an exterior-grade stain, paint, or clear finish. Paint gives the planter a crisp architectural look, especially in black, navy, cream, charcoal, or French blue. Stain highlights the wood grain and gives a relaxed garden feel.
If growing edibles, apply finish only to the exterior or choose products labeled appropriate for garden use. Let the finish cure fully before adding soil and plants.
Step 9: Fill with the right growing mix
Do not fill a tall wooden planter with dense yard soil. Garden soil can compact in containers, slow drainage, and suffocate roots. Use a high-quality potting mix or raised bed mix that drains well but still holds moisture.
For many container plantings, a blend of potting mix and compost works nicely. If the planter is deep and large, you can use a raised bed mix designed for container-style growing. Keep the soil light, fluffy, and well-aerated. Your plants want a comfortable root zone, not concrete with leaves.
Step 10: Plant with style
For a French-inspired planter, try structured plants such as lavender, rosemary, dwarf boxwood, small ornamental grasses, or topiary. For a lush seasonal display, use the classic “thriller, filler, spiller” method: one upright focal plant, several medium plants to fill the center, and trailing plants to soften the edges.
Good combinations include lavender with trailing thyme, rosemary with white alyssum, dwarf boxwood with ivy, or a compact tomato with basil and nasturtiums. For a patriotic French wink, use blue salvia, white petunias, and red geraniums. Subtle? No. Cheerful? Absolutely.
Design Ideas for a French-Style Tall Planter
The Versailles-inspired box
Build a square planter with strong corner posts, inset panels, and a slightly raised top rim. Paint it matte black or deep green and add a small finial to each corner. This style looks excellent with citrus, bay laurel, dwarf olive, rosemary, or clipped boxwood.
The farmhouse French planter
Use cedar boards with a natural stain, add simple trim, and plant lavender, sage, thyme, and trailing flowers. This look feels more Provence than palace, which is ideal if your patio has more barbecue grill than marble fountain.
The balcony herb tower
Make the planter narrow and tall, then add a removable interior pot. Plant basil, parsley, chives, mint, and thyme. Keep mint in its own container because mint has the personality of a charming guest who slowly takes over your entire house.
Common Mistakes to Avoid
Using soil that is too heavy
Heavy soil holds too much water and can make the planter difficult to move. It can also compact around roots. Choose potting mix or raised bed mix instead.
Forgetting drainage
Every container needs a way for excess water to escape. Without drainage, roots can rot, fertilizer salts can build up, and plants may decline quickly.
Building too tall without enough stability
A tall planter should be sturdy. Use strong legs, secure rails, and a broad enough base to prevent tipping. If the planter will sit in a windy spot, consider adding weight low in the frame or securing it discreetly.
Skipping exterior-rated hardware
Indoor screws can rust outdoors. Use exterior screws, stainless steel fasteners, or coated deck screws for better durability.
Sealing moisture inside the wood
Wood needs protection, but it also needs smart design. Avoid trapping water between plastic and wood without airflow. Drainage and drying are your planter’s best friends.
Maintenance Tips
Inspect the planter every season. Look for loose screws, peeling finish, soft wood, clogged drainage, or soil settling. Add fresh compost or potting mix as needed. If the exterior is painted or stained, refresh the finish every couple of years depending on sun and weather exposure.
Water containers more often than in-ground beds because they dry out faster. In hot weather, daily watering may be necessary. Water deeply enough that moisture reaches the lower roots, then let excess water drain away.
Fertilize container plants regularly, especially annual flowers and vegetables. Repeated watering can wash nutrients from the growing mix. A slow-release fertilizer or diluted liquid feed can keep plants looking strong through the season.
Plants That Look Great in a Tall Wooden Planter
- Lavender: Perfect for a French-inspired theme and loves sun.
- Rosemary: Upright, fragrant, and sculptural.
- Boxwood: Formal, evergreen, and ideal for topiary looks.
- Geraniums: Colorful, classic, and patio-friendly.
- Salvia: Adds vertical blue or purple flower spikes.
- Trailing thyme: Softens planter edges and smells wonderful.
- Ornamental grasses: Adds movement and height.
- Dwarf citrus: Beautiful in warm climates or movable containers.
Budget-Friendly Tips
To save money, use cedar fence pickets for the side panels and reserve thicker lumber for the legs and frame. Check the straightness of each board before buying. A warped board may look innocent in the store, but once you get home, it will reveal its true identity as a wooden banana.
You can also design the planter as a decorative sleeve for a plastic nursery pot. This method uses less soil, improves drainage, and makes seasonal plant changes easy. Instead of emptying the entire planter, you simply lift out one pot and drop in another.
Extra Experience: Lessons From Building a Tall Wooden Planter
The first thing you learn when building a tall wooden planter is that “square” is not a suggestion. It is the difference between a crisp garden feature and a box that looks like it had a difficult childhood. Take your time when measuring, cutting, and clamping. Check corners often. A few minutes with a speed square can save an hour of muttering later.
The second lesson is that drainage deserves more attention than decoration. It is tempting to obsess over trim, paint color, and whether the planter gives off “French courtyard” or “expensive restaurant patio.” But the plants care most about the basics: water, air, root space, and healthy growing media. A planter can be gorgeous and still fail if the bottom holds water like a bathtub.
Another practical experience: build the planter near where it will live, especially if it is large. An empty wooden planter is easy enough to carry. A filled planter is a different creature entirely. Once soil and water enter the conversation, the project becomes less “cute DIY” and more “why did I skip arm day?” If mobility matters, add locking casters before filling it.
Wood selection also matters more than beginners expect. Cedar costs more than basic pine, but it is pleasant to cut, smells wonderful, and handles outdoor life better. If using cheaper lumber, finishing becomes more important. Paint the exterior thoroughly, seal end grain, and keep the planter raised off wet surfaces. End grain absorbs moisture quickly, so those cut ends need extra attention.
One of the best design tricks is to make the planter look deeper than it actually is. Many tall planters do not need soil from top to bottom. By installing an internal shelf or support grid, you reduce weight and soil cost while keeping the tall profile. This is especially helpful for flowers, herbs, and decorative arrangements. For shrubs or vegetables with deeper roots, increase the planting depth accordingly.
Plant choice can completely change the personality of the planter. Lavender and rosemary make it feel sunny and Provençal. Boxwood makes it formal. Geraniums make it cheerful. A small citrus tree makes everyone suddenly say things like “orangerie,” even if they are standing next to a suburban garage. The tall structure gives plants presence, so even simple combinations look intentional.
Finally, expect the planter to age. Wood outdoors changes color, develops character, and occasionally asks for maintenance. That is not failure; that is patina. A quick seasonal inspection, a finish refresh, and good drainage will keep the planter attractive for years. Build it well, plant it thoughtfully, and your tall wooden planter will reward you every time you step outside with coffee and pretend your patio is in Provence.
Conclusion
Building a tall wooden planter is a rewarding DIY project that combines function, beauty, and a little French-inspired flair. With durable wood, strong construction, proper drainage, and the right planting mix, you can create a planter that elevates your garden literally and stylistically. Whether you fill it with lavender, herbs, flowers, boxwood, or a dramatic little citrus tree, the result is a custom outdoor feature that looks far more expensive than it has any right to be.
The secret is balance: sturdy frame, breathable soil, drainage that actually works, and a design that suits your space. Add trim, paint, stain, finials, or a trellis to make it your own. Then step back, admire your work, and say it with confidence: Vive la France, and long live the tall wooden planter.
Note: This article is written as original, publication-ready content based on practical DIY woodworking, container gardening, raised bed, and outdoor planter guidance from reputable home improvement, gardening, university extension, and wood science sources.

