
Hair Care
Ina Garten’s Baked Chocolate Pudding Recipe
Aug
Imagine a dessert that cannot decide whether it wants to be a brownie, a flourless chocolate cake, or a warm bowl of pudding. Instead of choosing, it becomes all threeand frankly, that is the kind of indecision we can support.
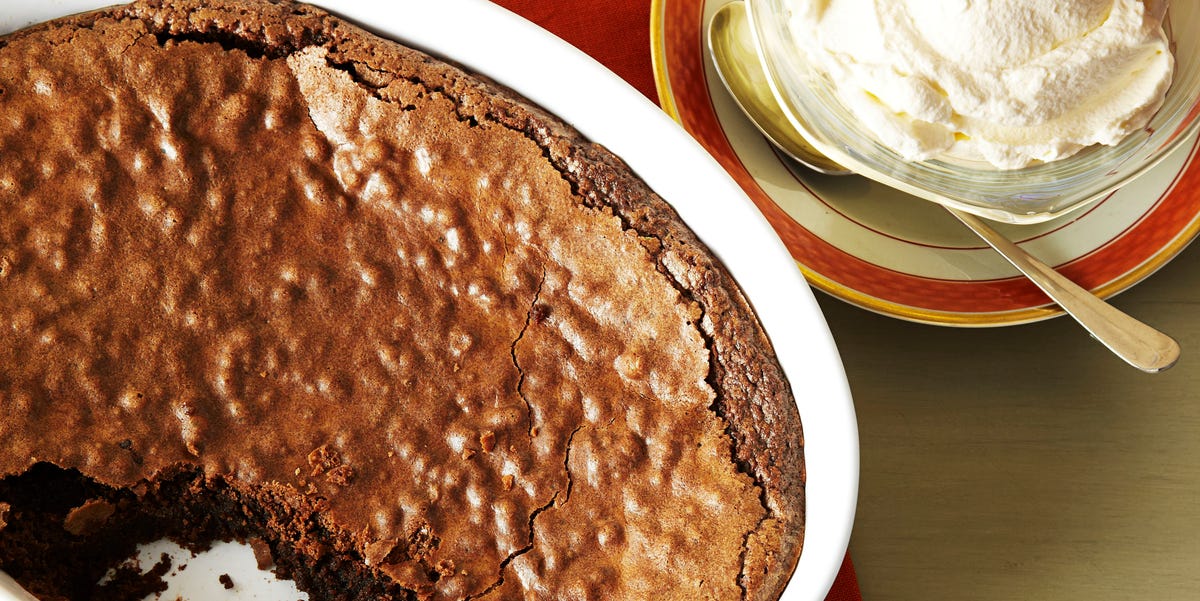
Ina Garten’s baked chocolate pudding, also widely known as her brownie pudding, develops a delicate crackly top, a fudgy layer underneath, and an unapologetically molten center. It uses familiar baking ingredients, but a long egg-whipping step and a gentle water bath transform them into something far more luxurious than an ordinary pan of brownies.
The original version appeared in Barefoot Contessa Back to Basics and was presented as a beginner-friendly dessert serving six. Garten has credited her friend Anna Pump, chef, cookbook author, and former owner of the Hamptons food shop Loaves & Fishes, with the recipe. It later enjoyed a major social-media revival, proving that excellent chocolate desserts do not expirethey simply wait for a new generation to discover them.
What Makes Ina Garten’s Baked Chocolate Pudding Special?
This is not a conventional stovetop pudding thickened with cornstarch, nor is it a standard brownie meant to be sliced into tidy squares. It is a baked chocolate dessert with three distinct textures:
- A thin, slightly crisp top that resembles a classic brownie crust
- A rich, chewy chocolate layer around the edges
- A warm, spoonable center similar to chocolate lava cake
The contrast is the entire point. Overbaking the center until it becomes firm would make the dessert easier to photograph, perhaps, but considerably less exciting to eat.
Another appealing feature is the short ingredient list. There is no baking powder, baking soda, melted chocolate, milk, or heavy cream in the batter. The dessert gets its volume from aerated eggs, its intense flavor from cocoa powder, and its decadent texture from a heroic quantity of butter. This is not the recipe to make when you are trying to use half a tablespoon of leftover butter. It arrives in full evening wear.
Ina Garten’s Baked Chocolate Pudding Recipe at a Glance
| Yield | Approximately 6 servings |
|---|---|
| Skill level | Beginner |
| Preparation time | About 20 minutes |
| Baking time | 1 hour |
| Oven temperature | 325°F |
| Recommended dish | A buttered 2-quart baking dish |
| Best served | Warm with vanilla ice cream |
Ingredients
- 1/2 pound or 2 sticks unsalted butter, plus additional butter for the baking dish
- 4 extra-large eggs, brought to room temperature
- 2 cups granulated sugar
- 3/4 cup high-quality unsweetened cocoa powder
- 1/2 cup all-purpose flour
- Seeds scraped from 1 vanilla bean
- 1 tablespoon framboise raspberry liqueur, optional
- Vanilla ice cream, for serving
These quantities follow Garten’s published formula. Because the dessert contains so few components, ingredient quality is noticeable. Fresh cocoa, real vanilla, and good unsalted butter will give the pudding a cleaner, deeper flavor.
Equipment
- A stand mixer fitted with the paddle attachment
- A fine-mesh sieve or flour sifter
- A 2-quart baking dish, ideally about 9 by 12 inches
- A large roasting pan or deeper baking pan
- A small saucepan or microwave-safe bowl for melting butter
- A cake tester, skewer, or thin knife
How to Make Ina Garten’s Baked Chocolate Pudding
1. Prepare the Oven and Baking Dish
Preheat the oven to 325°F. Butter the bottom and sides of a 2-quart baking dish generously. Do not treat the butter as decorative. This dessert develops sticky, fudgy edges, and a properly coated dish makes serving much easier.
Melt the two sticks of unsalted butter over low heat or in short microwave intervals. Set the butter aside until it is cool enough that it no longer feels hot. It can remain liquid, but it should not be steaming.
2. Beat the Eggs and Sugar Thoroughly
Place the room-temperature eggs and granulated sugar in the bowl of a stand mixer fitted with the paddle attachment. Beat on medium-high speed for 5 to 10 minutes.
This is the recipe’s most important step. The mixture should become significantly thicker, lighter in color, and increased in volume. When some of the batter falls from the paddle, it should briefly leave a visible ribbon on the surface before blending back in.
Room-temperature eggs capture air more easily than cold eggs, helping create the volume that this unleavened dessert needs. That trapped air later expands in the oven and contributes to the delicate crust.
3. Sift the Cocoa Powder and Flour
While the eggs are beating, sift the cocoa powder and flour together. Cocoa has an impressive ability to form stubborn little lumps that survive mixing and appear in the finished dessert like tiny pockets of chalky betrayal.
Sifting removes those lumps and distributes the relatively small amount of flour evenly. It also makes it easier to incorporate the dry ingredients without deflating the whipped egg mixture.
4. Add the Vanilla, Liqueur, and Dry Ingredients
Reduce the mixer speed to low. Add the scraped vanilla seeds and the optional framboise liqueur. Gradually add the sifted cocoa and flour, mixing only until the dry streaks disappear.
Avoid beating aggressively at this stage. The eggs already did the hard work of capturing air. Overmixing now can knock out that air and encourage excess gluten development, leading to a denser, more cake-like result.
5. Slowly Add the Cooled Butter
With the mixer still on low, pour in the melted, cooled butter in a slow stream. Stop mixing as soon as the batter looks uniform.
If the butter is too hot, it can weaken the egg foam and make the mixture feel greasy. If it has cooled so much that it begins to solidify, warm it just until fluid again. The goal is liquid butter without enough heat to cook breakfast inside the mixing bowl.
6. Assemble the Water Bath
Pour the batter into the prepared baking dish. Set that dish inside a larger roasting pan, preferably after placing the roasting pan on the extended oven rack.
Carefully pour very hot tap water into the outer pan until the water reaches approximately halfway up the sides of the pudding dish. Make sure no water splashes into the chocolate batter.
The water bath, also called a bain-marie, creates gentler and more even heat around the baking dish. Water heats more gradually than dry oven air, helping protect the edges while the center remains soft. This technique is also commonly used for custards and crème brûlée because it reduces harsh temperature changes and overcooking.
7. Bake for One Hour
Bake the pudding at 325°F for approximately one hour. Resist the urge to keep baking until the center looks completely set. That would be like ordering a convertible and permanently welding the roof closed.
Insert a cake tester about two inches from the edge. It should emerge mostly clean but still show some moist chocolate residue. The center should appear noticeably underbaked and may jiggle when the pan is moved.
Remove the baking dish carefully from the water bath and place it on a heat-safe surface. Allow the pudding to cool slightly before serving. As it rests, the outer portion will firm up while the middle remains soft and spoonable.
Why This Chocolate Pudding Recipe Works
Aerated Eggs Provide the Structure
Since the ingredient list does not include baking soda or baking powder, the batter relies on mechanically incorporated air. Beating eggs with sugar creates countless small bubbles. Egg proteins surround those bubbles, and the structure gradually sets as the dessert bakes.
This helps explain why the egg-and-sugar stage takes several minutes rather than a quick whisk. A pale, voluminous mixture produces a lighter crust and clearer contrast between the top and the molten center.
A Small Amount of Flour Keeps the Center Soft
Only half a cup of flour supports a batter containing four extra-large eggs, two cups of sugar, and two sticks of butter. That low flour ratio limits the amount of structure the dessert can develop.
The edges receive more heat and become chewy and brownie-like, while the center retains enough moisture to behave like pudding. Adding extra flour because the batter looks loose is not recommended. The batter is supposed to look loose. It has not lost its way.
Cocoa Powder Delivers Concentrated Chocolate Flavor
Unlike recipes based on melted chocolate, this baked pudding gets its primary chocolate flavor from cocoa powder. Cocoa powder is rich in cocoa solids but contains far less cocoa butter than bar chocolate, allowing the recipe’s added butter to control the richness and consistency.
Because the batter contains no chemical leavener, natural and Dutch-process cocoa can generally be selected according to flavor preference rather than their reaction with baking soda. Natural cocoa tends to taste sharper and fruitier, while Dutch-process cocoa is darker, smoother, and less acidic. Avoid sweetened hot cocoa mix, which contains sugar and other ingredients that can disrupt the recipe.
The Water Bath Controls the Edges
Without the water bath, the perimeter could become dry before the center reaches its ideal consistency. Surrounding the dish with hot water moderates the temperature, encouraging an evenly baked exterior and a soft interior.
The bath does not make the entire pudding custard-smooth. Instead, it helps create the intentional layers that distinguish this dessert from ordinary brownies.
Ingredient Tips and Practical Substitutions
What Can Replace the Vanilla Bean?
A vanilla bean adds floral depth and attractive black specks, but it can be expensive or difficult to find. One tablespoon of pure vanilla extract or vanilla bean paste is a practical substitute. Vanilla paste provides visible flecks, while extract disappears completely into the batter.
Vanilla plays a supporting role beneath the cocoa, so using extract will not ruin the dessert or trigger an emergency meeting of the Barefoot Contessa fan club.
Is Framboise Liqueur Necessary?
No. Framboise is optional. It introduces a subtle raspberry aroma that complements chocolate, but the pudding remains flavorful without it.
Cassis liqueur can provide a similar dark-berry character. For an alcohol-free version, simply leave the liqueur out rather than replacing it with a large amount of liquid. A small spoonful of strong coffee can deepen the chocolate flavor, although it changes the original formula.
Can Large Eggs Replace Extra-Large Eggs?
The published recipe calls for four extra-large eggs. Using four standard large eggs will usually still produce a tasty dessert, but the batter will contain slightly less egg and may bake somewhat more densely.
For closer volume, weigh the eggs without shells and aim for approximately 220 grams, or use four large eggs plus one additional yolk. Weighing is especially helpful when egg sizes vary dramatically between brands.
Should Salt Be Added?
The original ingredient list does not include salt. However, bakers who find the dessert very sweet may sift 1/4 teaspoon kosher salt with the cocoa and flour. Salt does not make the pudding taste salty at that level; it reduces the impression of sweetness and sharpens the cocoa flavor.
Common Mistakes and How to Avoid Them
Under-Whipping the Eggs
If the egg mixture remains thin and deep yellow, keep mixing. The batter needs the air created during this stage. Under-whipped eggs can produce a heavy pudding without the characteristic delicate top.
Using Hot Melted Butter
Hot butter may partially cook the eggs, collapse the foam, or separate from the batter. Melt it early so it has time to cool while the eggs and sugar are beating.
Overmixing After Adding Flour
Once the flour enters the bowl, use low speed and stop promptly. Prolonged mixing can deflate the eggs and create a tougher texture.
Skipping the Water Bath
A pan of hot water may feel like an unnecessary obstacle between you and dessert, but it is central to the recipe’s texture. Skipping it can produce dry edges and an unevenly cooked center.
Waiting for a Clean Cake Tester
A completely clean tester indicates that the pudding has probably gone too far. Test closer to the edge, not directly in the molten center, and expect moist crumbs or chocolate residue.
Serving It Immediately from the Oven
The center is extremely hot when the dish first comes out. A brief rest improves both safety and texture. Ten to twenty minutes is usually enough for the pudding to settle without losing its warm, flowing character.
How to Serve Baked Chocolate Pudding
Vanilla ice cream is the classic partner because it delivers temperature and flavor contrast. The cold ice cream begins melting into the warm chocolate, creating a sauce without requiring anyone to wash another saucepan.
Other serving ideas include:
- Fresh raspberries or strawberries for a tart, juicy contrast
- Lightly sweetened whipped cream
- A spoonful of raspberry sauce
- Toasted hazelnuts, pecans, or almonds
- A small pinch of flaky sea salt
- Espresso or strong coffee served alongside
Serve the pudding with a large spoon rather than attempting perfect slices. Its rustic appearance is part of the appeal. Once the ice cream begins melting, nobody at the table will be filing a complaint about geometry.
Can It Be Made Ahead?
The dessert can be baked earlier in the day and served at room temperature, but its molten quality is most dramatic while it is still warm. To restore some softness, warm individual portions briefly in the microwave or place the covered baking dish in a low oven.
Refrigerated leftovers will become denser and more fudge-like because the butter firms as it cools. That texture is different, but hardly tragic. Reheated leftovers are excellent with ice cream, berries, or a quiet moment beside the refrigerator when nobody else is watching.
My Experience Making Ina Garten’s Baked Chocolate Pudding
The first surprise when making this dessert is how ordinary the ingredient lineup looks. Butter, eggs, sugar, cocoa, flour, and vanilla do not exactly announce that something dramatic is about to happen. It resembles the beginning of a brownie recipe that has misplaced its chocolate chips.
Then the eggs and sugar begin to change. For the first few minutes, the mixer seems to be making sweet scrambled-egg soup. Gradually, the mixture turns pale and thick, climbs higher in the bowl, and falls from the paddle in glossy ribbons. That visual transformation is a reassuring sign that the recipe is working before it ever reaches the oven.
The batter becomes surprisingly fluid after the melted butter is incorporated. A baker accustomed to thick brownie batter may immediately suspect a measuring error. I certainly checked the flour measurement twice, stared suspiciously at the mixing bowl, and briefly considered adding more. Fortunately, resisting that impulse is essential. The loose batter is what allows the center to remain soft.
Building the water bath is the least glamorous part. The easiest method is to set the large roasting pan on the oven rack, place the filled pudding dish inside it, and then add hot water. Carrying a sloshing roasting pan across the kitchen feels like participating in a low-budget cooking game show where the grand prize is not burning your socks.
During baking, the top changes from shiny batter to a thin, slightly puffed crust. The edges look ready long before the middle does. At the one-hour mark, the center can appear so soft that every sensible baking instinct says, “Give it another fifteen minutes.” This is where trust matters. The soft center is not a manufacturing defect; it is the dessert’s main feature.
After resting for about fifteen minutes, the first spoonful reveals several textures at once. The top cracks delicately. The outer section has enough structure to resemble a very fudgy brownie. Beneath it, the chocolate becomes thick, glossy, and almost sauce-like.
The flavor is intensely sweet and rich. A modest serving is more satisfying than a giant bowl, especially when paired with vanilla ice cream. The ice cream is not merely decoration. It softens the cocoa’s intensity, cools each bite, and prevents the experience from feeling like you have signed a legally binding contract with two sticks of butter.
Fresh raspberries are another worthwhile addition. Their acidity cuts through the sweetness and echoes the optional framboise liqueur. When serving adults, I like the berry liqueur’s subtle aroma. For children or guests who prefer pure chocolate flavor, omitting it creates a more familiar brownie profile.
I also found that the baking dish affects the experience. A wide, shallow 2-quart dish creates more crust and chewy edge area. A narrower, deeper dish produces a thicker molten center and may need careful monitoring near the end. Matching the original dish dimensions gives the most predictable result.
The leftovers tell a different but equally delicious story. Refrigeration turns the pudding into something closer to dense chocolate fudge. A short reheating loosens the center again, although it may not return to its original lava-like consistency. Cold leftovers are excellent in small spoonfuls, while warm leftovers are better served as a plated dessert.
Most importantly, this recipe is an entertaining dessert that does not require last-minute decoration. It can arrive at the table in its baking dish, looking rustic and slightly cracked, while still feeling celebratory. The dramatic texture does the presentation work. Add ice cream, hand everyone a spoon, and accept the compliments as though the water bath was a feat of advanced culinary engineering.
Final Thoughts
Ina Garten’s baked chocolate pudding succeeds because it turns a small group of familiar ingredients into a dessert with several distinct personalities. The whipped eggs build a delicate crust, the low flour content preserves the fudgy texture, and the water bath protects the molten center.
The method is straightforward, but timing matters. Use room-temperature eggs, whip them until thick and pale, cool the melted butter, mix gently, and do not bake away the pudding-like center. Served warm with vanilla ice cream, the finished dessert is rich, nostalgic, and impressive without requiring pastry-school gymnastics.
It is part brownie, part pudding, and part excuse to eat melted ice cream with a spoon. In other words, it has its priorities in excellent order.

