
Beauty Unlocked
How To Choose an Outdoor Kitchen Sink
Jul
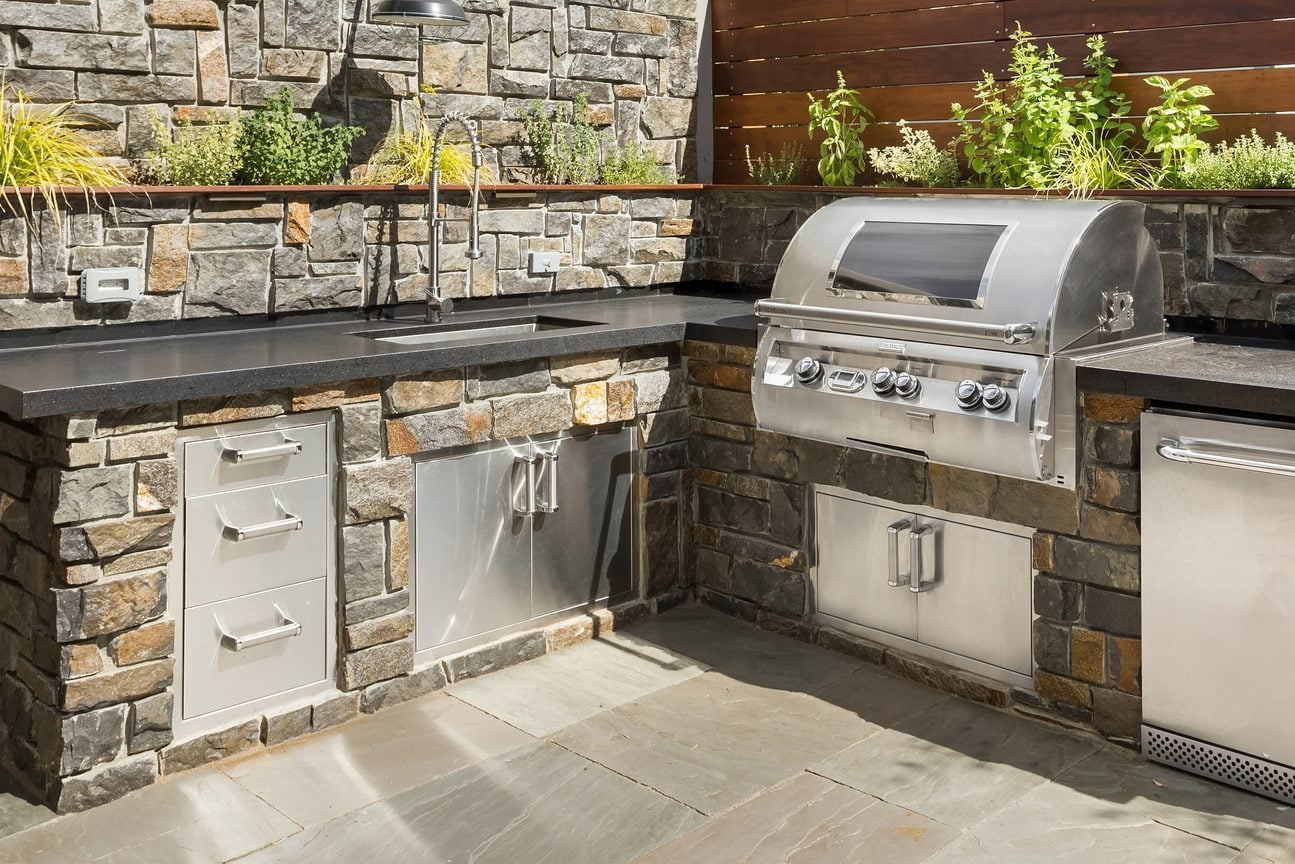
An outdoor kitchen sink may not have the star power of a six-burner grill or a pizza oven that reaches volcanic temperatures, but it often becomes the hardest-working feature in the backyard. It gives you a place to rinse vegetables, wash grilling tools, fill pots, clean sticky barbecue sauce off your hands, and keep raw-food messes out of the indoor kitchen.
Choosing one is not as simple as buying an indoor sink and exposing it to the weather. Outdoor fixtures must withstand rain, humidity, sunlight, temperature changes, airborne salt, insects, leaves, and the occasional guest who treats the basin like an ice chest. The right choice depends on your climate, cooking habits, available space, countertop, plumbing plan, and willingness to perform seasonal maintenance.
This guide explains how to choose an outdoor kitchen sink that looks good, works efficiently, and does not become an expensive backyard birdbath after one winter.
Start With the Way You Will Use the Sink
Before comparing materials or finishes, decide what you expect the sink to do. A compact prep sink may be sufficient for washing herbs, rinsing produce, filling glasses, and cleaning your hands. A larger outdoor kitchen sink is better when you regularly prepare full meals, wash grill grates, clean oversized utensils, or entertain large groups.
Choose a prep sink when:
- Your outdoor kitchen has limited counter and cabinet space.
- You mainly need water for food preparation and handwashing.
- Most dishes will still be taken indoors.
- You want to preserve more countertop space for serving.
Choose a full-size sink when:
- You cook complete meals outdoors.
- You frequently handle raw meat, seafood, or poultry.
- You want to wash pots, platters, grilling baskets, and cutting boards.
- Your outdoor kitchen is far from the house.
Outdoor-kitchen planning guidance consistently treats a sink as part of the preparation and cleanup zone. Locating it close to your food-prep counter makes cooking more efficient, while placing it too far from the grill creates unnecessary traffic across the patio.
Select a Material That Can Survive Outdoors
Sink material determines how well the basin handles corrosion, temperature changes, stains, impacts, and daily cleaning. Attractive finishes are welcome, but outdoor durability should lead the decision.
Stainless steel is usually the safest choice
Stainless steel dominates the outdoor sink market for good reason. It is relatively lightweight, easy to clean, heat-resistant, and less vulnerable to cracking than many stone, ceramic, or enameled materials. A brushed or satin finish is especially practical because it disguises water spots and minor scratches better than a mirror-polished surface.
Standard Type 304 stainless steel can perform well in a covered outdoor kitchen in a dry or moderate inland climate. However, Type 316 stainless steel is the stronger choice for an exposed installation, humid location, coastal property, or poolside kitchen. Type 316 contains molybdenum, which improves resistance to corrosion caused by salt and chlorides. Manufacturers commonly describe it as marine-grade stainless steel and use it for sinks intended specifically for outdoor environments.
Understand stainless-steel gauge
Steel gauge works backward: a lower number means thicker metal. A 16-gauge sink is thicker than an 18-gauge sink, while a 22-gauge basin is comparatively thin.
For a frequently used outdoor kitchen, 16-gauge stainless steel offers excellent rigidity and dent resistance. Quality 18-gauge steel is also suitable for many residential installations and may cost less. Very thin steel can flex, vibrate, and produce more noise when water hits the basin. Sound-deadening pads or an insulated undercoating help control the familiar stainless-steel drum solo.
Consider other materials cautiously
Copper develops a distinctive patina and can create a warm, handcrafted appearance. However, its color changes over time, and acidic foods or harsh cleaners can alter the surface. Copper is best for homeowners who appreciate an evolving finish rather than expecting permanent showroom perfection.
Granite composite is durable and visually substantial, but verify that the manufacturer approves the specific model for outdoor use. Dark composite sinks exposed to direct sunlight may become hot, and some materials can fade or react poorly to repeated freezing and thawing.
Fireclay, porcelain, enameled steel, and cast iron are attractive indoors, but they are generally less forgiving outside. Heavy impacts can chip the enamel, exposed metal may rust, and freeze-thaw cycles can create additional stress. Never assume a sink is outdoor-rated simply because it looks sturdy enough to survive a small meteor.
Choose the Right Size and Bowl Configuration
Measure the cabinet, countertop, and plumbing space before shopping. Record the maximum sink width, front-to-back depth, bowl depth, faucet clearance, and usable cabinet space underneath. Do not forget that mounting clips, supply valves, drain fittings, filters, and waste lines also need room.
A compact bar or prep sink may measure roughly 15 to 21 inches wide. A primary cleanup sink commonly falls in the 25- to 33-inch range. Product dimensions vary, so always use the manufacturer’s cutout template rather than relying on the advertised width alone. Sink-buying guides also recommend matching bowl depth to the cabinet because a deeper basin consumes more under-counter space.
Single-bowl sinks
A single bowl is often the most practical outdoor configuration. It provides uninterrupted space for large platters, grill baskets, cutting boards, and stockpots. It is also easier to wipe clean because there is no center divider collecting sauce, grease, and mysterious crumbs.
Double-bowl sinks
A double bowl lets you separate washing and rinsing or keep raw-food preparation away from clean utensils. The tradeoff is that each compartment is smaller. Double bowls work best when the outdoor kitchen is large enough to accommodate a wide sink without sacrificing essential prep space.
Workstation sinks
A workstation sink has an integrated ledge that supports accessories such as a cutting board, colander, drying rack, serving tray, or ice bin. It is particularly useful in a compact outdoor kitchen because the sink can double as a food-preparation surface. Some models also include a fitted cover, which restores counter space and keeps debris out when the basin is not being used.
Compare Drop-In and Undermount Installation
Drop-in sinks
A drop-in, top-mount, or self-rimming sink is lowered into a countertop opening, with its rim resting on the surface. This format is generally easier to install and replace. The visible rim protects the edge of the countertop cutout, making top-mount sinks a dependable choice for modular islands, tile counters, wood counters, or do-it-yourself installations.
The disadvantage is that water, crumbs, and outdoor dust can collect along the rim. A high-quality exterior-grade sealant must be applied carefully to prevent moisture from entering the cabinet or countertop.
Undermount sinks
An undermount sink attaches beneath the countertop. It creates a clean appearance and allows you to sweep water and scraps directly into the basin. However, the countertop must be waterproof and structurally capable of supporting the sink. Granite, concrete, quartzite, and other solid surfaces are better suited to this mounting style than outdoor wood or standard laminate.
Undermount installation requires accurate cutting, strong mechanical support, and weather-resistant adhesive and sealant. Because outdoor cabinets move slightly with temperature and humidity, professional installation is often worth the expense.
Plan the Plumbing Before Buying the Sink
The basin itself may be affordable; getting water to it and wastewater away from it is often the expensive part. Plan the water supply, shutoff valves, drainage, venting, winterization access, and local permit requirements before cutting the countertop.
Permanent plumbing
A permanent connection to the home’s potable-water and sanitary-drain systems offers the greatest convenience. It allows you to use the sink much like an indoor fixture without emptying buckets or restricting what goes down the drain. A licensed plumber can determine the required pipe sizes, venting, backflow protection, cleanouts, and connection points under local code.
Temporary or simplified systems
A cold-water connection supplied by an approved hose may work for a seasonal or portable setup. Wastewater can sometimes drain into a removable container, but the container must be emptied regularly. Landscape drainage may be restricted by local rules, especially when wastewater contains food particles, grease, detergent, or contaminants.
Do not direct greasy dishwater into a flower bed and call it irrigation. A drainage approach suitable for rinsing garden tools may not be acceptable for a sink used to wash meat, cookware, or dishes. Outdoor plumbing guides recommend evaluating local codes and determining the drainage plan before installation.
Hot water or cold water?
Cold water is enough for rinsing produce, filling pots, and basic cleanup. Hot water adds comfort and makes greasy cookware easier to wash, but it increases installation complexity. Possible solutions include extending the home’s hot-water line, installing a small point-of-use heater, or using a properly designed outdoor hot-and-cold fixture.
Any electrical equipment near the sink should be outdoor-rated and connected according to local electrical requirements, including appropriate ground-fault protection.
Prepare for Freezing Weather
In a cold climate, an outdoor sink must be designed for winterization. Water trapped inside supply lines, faucet cartridges, valves, traps, filters, or flexible hoses can freeze, expand, and damage components.
A practical system includes accessible indoor or protected shutoff valves, drain-down points, removable hoses, and piping arranged so water does not remain trapped. Before freezing temperatures arrive, shut off the supply, open the faucet, drain the lines, and follow the manufacturers’ winter-storage instructions for the faucet and accessories. Frost-resistant outdoor components may reduce risk, but they do not eliminate the need to winterize an entire sink system.
Pick an Outdoor-Appropriate Faucet
A durable sink deserves an equally durable faucet. Look for a model approved by its manufacturer for outdoor installation. Stainless steel and solid-brass construction generally withstand weather better than inexpensive plated fixtures. A ceramic-disc cartridge can provide reliable operation and reduce dripping.
A high-arc faucet creates clearance for pots and grill tools, while a pull-down sprayer makes it easier to rinse the corners of a large basin. Make sure the faucet can rotate without striking a backsplash, grill lid, wall, or overhead shelf.
Before ordering, confirm the sink’s faucet-hole configuration. Some sinks come with one hole, several predrilled holes, or no holes at all. Drilling stainless steel after purchase may affect the warranty, so decide whether you need a faucet, soap dispenser, filtered-water faucet, or accessory control before finalizing the sink.
Look for Features That Improve Daily Use
- A fitted cover: Keeps out leaves, pollen, rainwater, insects, and airborne debris while providing extra workspace.
- A bottom grid: Protects the basin from scratches and keeps dishes above standing water.
- A basket strainer: Captures food debris before it reaches the drain.
- Rounded interior corners: Are easier to clean than extremely sharp corners.
- Sound insulation: Reduces vibration and water noise.
- A rear or offset drain: Preserves useful storage space beneath the sink.
- Workstation accessories: Turn a small basin into a cutting, rinsing, drying, and serving station.
Accessories should also tolerate outdoor exposure. A beautiful hardwood cutting board left uncovered in rain and sunlight will eventually become a science project.
Match the Sink to the Countertop and Cabinet
The countertop must support the filled sink while resisting water penetration around the cutout. Stone, concrete, porcelain slab, stainless steel, and exterior-rated tile are common choices. Wood can create an inviting appearance, but it requires careful sealing, ventilation, and ongoing maintenance.
The base cabinet should be weather-resistant and strong enough to support the sink, plumbing, and stored supplies. Stainless steel, masonry, marine-grade polymer, and properly finished exterior cabinetry are common options. Include ventilation and drainage paths so small leaks do not remain trapped inside a sealed cabinet.
Keep the sink far enough from grills, burners, and pizza ovens to prevent heat damage and reduce cross-contamination, but close enough to the prep zone to be convenient. Avoid placing it where an open grill lid blocks the faucet or where seated guests must dodge wet utensils.
Check the Warranty and Outdoor Rating
One of the easiest mistakes is purchasing an indoor sink whose warranty excludes outdoor installation. Read the warranty, care guide, and installation manual before ordering. Confirm that outdoor use, expected temperatures, coastal exposure, mounting method, and cleaning products are covered.
Also check whether the package includes the drain assembly, mounting hardware, faucet, cutting template, grid, cover, and accessories. A suspiciously low price sometimes means the photograph includes several items that the box does not.
Create a Realistic Budget
The total cost includes more than the basin. Account for the faucet, drain, trap, supply lines, shutoff valves, countertop fabrication, cabinet reinforcement, plumbing labor, permits, electrical work, weatherproof sealant, accessories, and winterization components.
A small drop-in sink near an existing water line may be relatively economical. A large undermount sink installed far from the house with hot water and a permanent sanitary drain can become a substantial project. Obtaining plumbing and countertop estimates before selecting the sink helps prevent a $300 fixture from quietly inviting several thousand dollars of friends to the party.
Practical Experience: Lessons Outdoor Sink Projects Teach You
The following lessons reflect recurring experiences reported by homeowners, designers, product specialists, and installers. They are useful because outdoor-kitchen problems rarely appear in polished showroom photographs.
A bigger sink is not automatically a better sink
Many homeowners begin by wanting the largest basin that will fit. After installation, they discover that the oversized sink consumed the counter space needed for trays, seasonings, uncooked food, and serving dishes. A moderately sized workstation sink often performs better because its cutting board and drying rack create usable space above the bowl. Measure your largest grill basket or platter, then choose a basin that accommodates it without swallowing the entire island.
The plumbing route can decide the sink location
A picturesque location at the far edge of the patio may look perfect on a drawing. Then the plumber explains the trenching, concrete cutting, drainage slope, venting, and repair access required to reach it. In many projects, moving the sink a few feet closer to the house dramatically lowers installation cost. Decide where water and drainage can realistically run before treating the sink location as permanent.
Outdoor debris finds every uncovered opening
Owners of uncovered sinks quickly learn that leaves are only the beginning. Pollen, dust, seed pods, insects, feathers, rainwater, and occasional gifts from passing birds can collect in the basin. A fitted sink cover prevents much of this mess and restores counter space when the sink is idle. It is one of those accessories that initially feels optional and later feels like it should have been included in the Constitution.
Coastal environments punish shortcuts
Near the ocean, salt carried through the air can settle on the sink even when it never touches seawater. Lower-grade stainless steel, exposed fasteners, faucet components, and cabinet hardware may begin staining before the basin itself. Marine-grade Type 316 stainless steel, corrosion-resistant mounting hardware, regular freshwater rinsing, and a protective cover provide better long-term results. The sink’s accessories and faucet should receive the same scrutiny as the bowl.
Winterization must be easy or it will be postponed
A system that requires crawling behind appliances, removing permanent panels, or using specialized tools is less likely to be winterized on time. Successful cold-climate installations place shutoff valves and drain points where they can be reached quickly. Clear labels also help. Months after installation, “the small valve behind the second cabinet” is not nearly as memorable as it sounds during summer.
Sharp corners look modern but require more cleaning
Zero-radius sinks have crisp architectural lines, yet food residue and mineral deposits collect more easily in their tight corners. Homeowners who prioritize fast cleanup often prefer gently rounded corners. A brushed finish also tends to age more gracefully than a highly polished surface, especially in areas with hard water.
The sink should support the cooking routine
The most satisfying installations begin with a realistic workflow. A household that mainly grills burgers may only need cold water and a compact prep basin. A family that cleans seafood, makes pizza dough, mixes drinks, and hosts weekend gatherings benefits from a larger bowl, hot water, a pull-down faucet, and a permanent drain. Buying for the way you actually cook produces better results than buying for the backyard kitchen you imagine appearing in a television commercial.
Conclusion
The best outdoor kitchen sink is not necessarily the largest, most expensive, or most decorative model. It is the sink that matches your climate, cooking routine, countertop, cabinet, plumbing system, and maintenance habits.
For most homes, a 16- or 18-gauge stainless-steel single bowl is a dependable starting point. Choose Type 316 marine-grade steel for coastal, poolside, humid, or heavily exposed locations. Measure carefully, confirm the outdoor-use warranty, plan drainage before installation, and make winterization simple. Add a durable faucet, basket strainer, bottom grid, and fitted cover to create a station that remains useful long after the first backyard barbecue.
Note: Local plumbing, drainage, sanitation, electrical, and permit requirements vary. Consult qualified local professionals before installing permanent water, wastewater, gas, or electrical connections.

