
Body Care
Bedroom Dresser Makeover
Aug
A bedroom dresser makeover can rescue a tired piece of furniture, refresh an entire room, and save you from spending Saturday afternoon assembling a new dresser with 147 screws and one mysterious leftover bracket. Whether your dresser is solid wood, veneer, laminate, or a thrift-store mystery made from several materials at once, a thoughtful update can make it look stylish, intentional, and surprisingly expensive.
The secret is not simply choosing a pretty paint color. A successful dresser makeover begins with inspecting the furniture, planning the finish, preparing the surface correctly, and allowing every coat to dry. Skip those steps, and your elegant new dresser may start peeling before you finish organizing the sock drawer.
This guide explains how to plan and complete a durable DIY bedroom dresser makeover, including painting, staining, hardware upgrades, decorative details, budget ideas, common mistakes, and practical lessons from real-world furniture projects.
Should You Make Over or Replace Your Dresser?
Before buying paint, examine whether the dresser is worth saving. Cosmetic problems are usually manageable. Structural problems require more thought.
Good Candidates for a Makeover
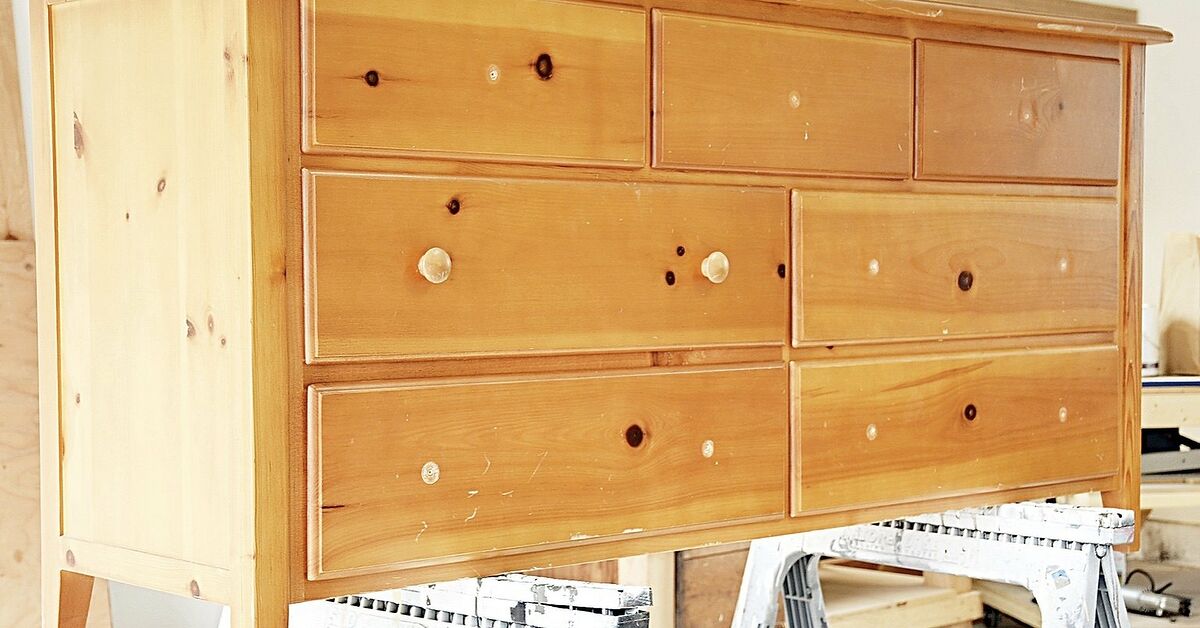
A dresser is generally worth updating when its frame is stable, its drawers still function, and most of the damage is limited to scratches, stains, faded color, dated hardware, or an unattractive finish. Solid-wood pieces are especially desirable because they can often be sanded, repaired, stained, and refinished multiple times.
Veneer and laminate dressers can also be transformed, but they require gentler sanding and a primer made for slick, nonporous surfaces. Preparation guidance from major paint and home-improvement companies consistently emphasizes cleaning, deglossing, priming, and applying multiple thin coats for a durable finish.
Problems That May Not Be Worth Repairing
Think carefully before refinishing a dresser with major water damage, widespread mold, crumbling particleboard, badly warped drawers, or a frame that rocks even after the fasteners are tightened. Repairs can quickly cost more than the piece is worth.
Open and close every drawer before starting. Check the runners, joints, drawer bottoms, legs, and back panel. A fresh coat of navy paint will not improve a drawer that requires a wrestling match every morning.
Choose a Makeover Style Before Shopping
Your dresser should coordinate with the bedroom without looking as though it was dipped in the same bucket as every other object. Consider the wall color, flooring, bedding, lighting, and existing wood tones.
Modern and Minimal
Choose matte black, warm white, mushroom, charcoal, or muted green. Add streamlined pulls in black, brass, brushed nickel, or wood. A simple monochromatic finish works especially well on dressers with clean lines.
Midcentury Modern
Combine visible wood grain with a restrained painted section. Walnut-colored stain, tapered legs, warm olive paint, and brass hardware can give a plain dresser a convincing midcentury personality. Similar paint-and-stain combinations are frequently used to update basic furniture while preserving visual warmth.
Vintage or Cottage Style
Try chalk-style paint, milk paint, soft blue, dusty rose, creamy white, or pale sage. Lightly distress selected edges rather than attacking the whole piece with sandpaper. Realistic wear appears around corners, handles, feet, and drawer edgesnot randomly across the middle like the dresser survived a small tornado.
Bold and Artistic
Use color blocking, ombré drawers, stripes, stencils, wallpaper, floral artwork, or geometric patterns. A dresser is large enough to become a bedroom focal point but small enough that you can repaint it when your “electric tangerine era” reaches a natural conclusion.
Bedroom Dresser Makeover Supplies
Your exact materials will depend on the dresser and finish, but a practical starter list includes:
- Drop cloth or plastic sheeting
- Screwdriver or drill
- Painter’s tape and labels
- Gentle degreasing cleaner
- Clean microfiber cloths
- Wood glue and clamps
- Paintable wood filler
- Sandpaper in appropriate grits
- Dust mask, gloves, and eye protection
- Vacuum and tack cloth
- Bonding or stain-blocking primer
- Furniture, cabinet, enamel, chalk-style, or milk paint
- Quality brush and small foam or fine-finish roller
- Wood stain and conditioner, if needed
- Protective topcoat or furniture wax
- New knobs, pulls, legs, or decorative trim
Do not assume that one primer works for every surface. Bare wood, glossy laminate, MDF, metal, and stain-prone woods may need different products. Select materials according to the manufacturer’s instructions rather than whatever half-empty can has been living in the garage since 2018.
How to Complete a Bedroom Dresser Makeover
1. Empty, Disassemble, and Label Everything
Remove clothing, drawer liners, hardware, drawers, detachable legs, and removable decorative pieces. Place screws in labeled bags so you know where they belong later. Mark drawers discreetly with painter’s tape because older drawers may fit best in their original openings.
Photograph the dresser before disassembly. The pictures can help you remember hardware placement, and the before-and-after comparison will provide proof that the ugly brown object in the garage was not a shared hallucination.
2. Clean the Entire Dresser
Paint does not bond well to dust, furniture polish, skin oils, wax, or decades of mysterious bedroom residue. Vacuum the drawers and frame, then clean the exterior with a suitable degreasing product. Use minimal moisture on wood and allow the dresser to dry completely.
Pay special attention to the top, drawer pulls, and edges. These areas collect the most oils and grime. Painting over contamination is one of the fastest ways to create chips and peeling.
3. Make Structural and Cosmetic Repairs
Tighten loose screws, reglue unstable joints, repair drawer bottoms, and replace broken runners before painting. Fill unwanted hardware holes, dents, or deep scratches with wood filler. Let the filler dry, then sand it flush with the surrounding surface.
When changing from knobs to wide pulls, measure the new hole spacing before filling or drilling anything. A hardware template saves time and helps keep the handles aligned. Crooked drawer pulls are charming only when the design is intentionally whimsical.
4. Sand or Degloss the Surface
Most previously finished furniture does not need to be stripped to bare wood when it will be painted. Instead, lightly sand or degloss the surface to remove shine and create texture for primer adhesion. Sand solid wood in the direction of the grain. Use a finer grit on veneer and laminate so you do not cut through the thin decorative layer.
For a complete stain makeover, the old finish generally must be removed more thoroughly so the new stain can penetrate evenly. Refinishing guides commonly recommend progressing from a medium abrasive to a finer grit and removing all dust before staining.
After sanding, vacuum every surface and wipe away the remaining dust. Tiny particles may seem harmless until they become permanent decorative bumps beneath your paint.
5. Apply the Correct Primer
Primer improves adhesion, creates a consistent base, and can prevent old stains or wood tannins from bleeding through a light paint color. A bonding primer is particularly useful for laminate, glossy finishes, and other difficult surfaces. A stain-blocking primer may be necessary for knotty, reddish, or previously stained wood.
Apply a thin, even coat with a brush, roller, or sprayer. Let it dry for the full time listed on the container. Lightly sanding the dry primer with fine-grit sandpaper can remove ridges and produce a smoother final surface.
6. Paint in Thin, Controlled Coats
Choose a durable paint intended for furniture, trim, cabinets, or other frequently handled surfaces. Apply paint in thin coats rather than one heroic, dripping coat. Use a fine-finish roller on broad, flat areas and a quality brush for corners, trim, and details.
Work methodically and inspect for drips before moving to the next section. Allow each coat to dry according to the product instructions. Two or three thin coats usually look smoother and cure more reliably than one thick coat.
For spray paint, work in a well-ventilated location and use several light passes. Keep the can moving rather than aiming at one spot until it resembles a wet birthday cake. Bare or porous wood may also require primer to prevent uneven absorption.
7. Stain the Wood, When Appropriate
Stain is a good choice when the dresser has attractive solid wood or high-quality veneer. Strip or sand away the existing finish, remove dust, and test the stain in an inconspicuous location.
Some woods absorb stain unevenly, so a pre-stain conditioner may help minimize blotching. Apply the stain with the grain, remove excess product as directed, and allow adequate drying time. Staining is not a magical wood-printing filter; damaged particleboard will not suddenly become walnut.
Wood-finishing guidance recommends applying stain to bare or properly stripped wood and using conditioner when the species is prone to uneven absorption.
8. Add Decorative Details
Once the base finish has dried, personalize the dresser with one or two design elements. Options include:
- Wallpaper or peel-and-stick paper on drawer fronts
- Wallpaper inside the drawers
- Fluted dowels or half-round molding
- Painted stripes or geometric blocks
- Stenciled patterns
- Contrasting drawer colors
- Wood appliqués
- Metal corner brackets
- New legs or a decorative base
Wallpaper adheres best to clean, smooth drawer fronts. Dimensional trim should be measured carefully and attached securely before the final paint coats. Dresser makeover galleries from major home-design publications show that paint, paper, molding, and hardware can dramatically change a simple piece without rebuilding it.
9. Replace or Refresh the Hardware
New hardware is often the quickest way to make an old dresser feel current. Before ordering pulls, measure the distance between the existing screw holes from center to center. Choosing matching dimensions can prevent extra filling and drilling.
Mixing finishes can work, but repeat the new finish elsewhere in the room. Brass pulls might coordinate with a lamp, while matte-black knobs can echo a mirror frame. When reusing metal hardware, clean it thoroughly and use a primer and paint formulated for metal.
10. Protect the Finish and Let It Cure
Not every furniture paint requires a separate topcoat, so check the product instructions. When additional protection is recommended, choose a compatible clear finish in matte, satin, semigloss, or gloss. Water-based clear coats are popular over light colors because many remain clearer than traditional oil-based products.
A finish may feel dry long before it has fully cured. Handle the dresser gently, avoid dragging decorations across the top, and delay filling the drawers when possible. Rushing the cure time can leave dents, fingerprints, or objects permanently attached to the surfacea bold design choice nobody requested.
Easy Dresser Makeover Ideas for Different Budgets
Makeover Under $50
Clean the dresser, touch up minor scratches, and install inexpensive knobs. Add peel-and-stick paper inside the drawers or paint only the drawer fronts. Using leftover wall paint may be possible if it is suitable for furniture and protected as needed.
Makeover From $50 to $150
Purchase a quality primer, furniture paint, a small roller, new hardware, and a compatible topcoat. This budget supports a complete color transformation and usually provides the best balance between cost and durability.
Makeover From $150 to $300
Add premium hardware, new legs, wood trim, decorative overlays, or a stained top. You might also repair damaged drawers or purchase better application tools. The result can resemble custom furniture while remaining less expensive than many new solid-wood dressers.
Common Dresser Makeover Mistakes
Skipping the Cleaning Step
Sanding alone may spread grease and wax instead of removing them. Clean first, allow the dresser to dry, and then sand.
Using the Wrong Primer
A general-purpose primer may not bond reliably to glossy laminate or block tannin bleed. Match the primer to the surface and the planned topcoat.
Painting Thick Coats
Heavy coats dry slowly, collect drips, and remain soft longer. Thin applications require more patience but create a cleaner finish.
Ignoring Drying and Curing Times
Dry-to-touch does not mean ready for socks, jewelry boxes, lamps, and an enthusiastic housecat. Follow the manufacturer’s recoat and cure guidance.
Forgetting Safety
Very old painted furniture may contain lead. Sanding or scraping an unknown finish can create hazardous dust, so consider testing before disturbing it. The U.S. Environmental Protection Agency recommends lead-safe methods that minimize dust, isolate the work area, and use suitable protective equipment when lead may be present.
After completing the makeover, anchor the dresser securely to the wall with an appropriate anti-tip system, particularly in homes where children live or visit. Unsecured clothing-storage furniture can tip when drawers are opened or climbed upon.
What Experience Teaches You About a Bedroom Dresser Makeover
The first lesson from real-world dresser projects is that inspection matters more than inspiration. It is easy to fall in love with a curvy thrift-store dresser and imagine it painted deep green with elegant brass pulls. The romance fades slightly when you discover one drawer is held together by tape and another has apparently been used as a snack bar by a family of mice. Checking the frame, drawers, odor, veneer, and hardware before buying prevents an inexpensive project from becoming an accidental furniture apprenticeship.
Another practical lesson is that preparation always takes longer than expected. Cleaning, removing hardware, filling dents, waiting for filler, sanding, vacuuming, and priming may consume most of the project. Painting is often the fastest stage. This can feel unfair because painting is the part shown in satisfying makeover videos, while nobody makes dramatic slow-motion footage of wiping sanding dust from a drawer for the fourth time.
Color testing is equally important. A paint chip viewed under store lighting can look completely different beside bedroom curtains and warm bedside lamps. Muted blue may become bright aqua, while sophisticated beige may suddenly resemble an office filing cabinet. Painting a sample board and viewing it during the morning, afternoon, and evening helps reveal how the color behaves in the actual room.
Hardware can also change the personality of a dresser more than expected. Small wooden knobs create a casual or Scandinavian feeling. Dark metal pulls look modern and graphic. Aged brass can make a plain chest feel collected and vintage. However, beautiful hardware becomes frustrating when its screw spacing does not match the existing holes. Measuring twice is not just a woodworking proverb; it is protection against spending an evening filling sixteen unnecessary holes.
Experience also teaches restraint. Many makeover ideas look attractive individually, but combining fluting, gold trim, wallpaper, three paint colors, oversized handles, stencils, and decorative feet can make the dresser resemble a craft store during an earthquake. One strong feature and one supporting detail are usually enough. For example, pair sage-green paint with brass pulls, or combine a natural wood top with matte-black drawer fronts.
The drying period is where patience is tested most severely. The dresser may look finished, the bedroom may be messy, and every item of clothing may be piled on the bed. Reassembling too early can scratch drawer edges, imprint hardware into soft paint, or cause drawers to stick. Giving the finish additional curing time produces a more durable result and reduces the chance of touching up a project that was technically completed yesterday.
Finally, a good bedroom dresser makeover does not need to be flawless. Minor brush texture, a repaired dent, or a slightly uneven vintage drawer can add character. The goal is not to manufacture factory furniture in the garage. The goal is to create a useful, attractive piece that fits the room, functions well, and feels worth keeping. That combination of style, practicality, and personal effort is what makes an old dresser more satisfying than a disposable replacement.
Conclusion
A bedroom dresser makeover can deliver one of the biggest visual improvements in a bedroom without requiring a full remodel. Start with a structurally sound piece, match the products to its material, and devote enough time to cleaning, repairs, sanding, priming, painting, and curing. Finish the transformation with well-proportioned hardware or one distinctive decorative detail.
The final dresser does not need to fool an antiques dealer or win a furniture-design award. It simply needs to look better, work properly, and make you smile when you walk into the room. Achieve all three, and the makeover has done its job beautifully.
Note: This article synthesizes furniture refinishing, painting, staining, decorative makeover, lead-safety, and anti-tip guidance from reputable U.S. resources, including This Old House, HGTV, Better Homes & Gardens, Martha Stewart, The Home Depot, Lowe’s, Benjamin Moore, Rust-Oleum, Minwax, the U.S. Environmental Protection Agency, and the U.S. Consumer Product Safety Commission.

