
Hair Care
Kitchen Backsplash Makeover
Aug
A kitchen backsplash occupies a relatively small strip of wall, yet it can change the mood of tile, and suddenly the cabinets look cleaner. Add deep green squares behind a white range, and the kitchen develops a personality beyond “place where the toaster lives.”
A backsplash also performs an important job: protecting the wall from water, grease, coffee, tomato sauce, and those mysterious splatters nobody remembers creating. The best kitchen backsplash makeover therefore balances style, durability, maintenance, cost, and installation quality.
This guide covers backsplash materials, design ideas, budgeting, installation steps, common mistakes, and real-world renovation experiences. The goal is not merely to install something fashionable. It is to create a surface that still looks good after the kitchen behaves like a kitchen.
Why a Kitchen Backsplash Makeover Has Such a Big Impact
A backsplash sits at eye level and visually connects the cabinets, countertops, appliances, hardware, and wall color. Because it touches nearly every major kitchen finish, changing it can make existing elements look newly coordinated.
Unlike a full renovation, a backsplash project can usually leave cabinets, plumbing, flooring, and major appliances in place. That means less disruption, a more manageable budget, and fewer opportunities for a simple update to become the financial equivalent of adopting a horse.
Backsplashes can be made from ceramic, porcelain, glass, stone, metal, slabs, paint, wallpaper, and peel-and-stick panels. Current design resources show everything from classic subway tile to full-height stone and statement-making patterns, giving homeowners options for nearly every style and budget. n the Makeover Before Removing Anything
Use the Countertop as Your Design Anchor
If the countertop is staying, begin there. Countertops generally cover more visual area and may contain strong veining, speckles, or color movement. A heavily patterned quartz or granite surface usually works best with a quieter backsplash. A simple countertop can support bolder color, texture, or pattern.
Bring physical samples home and place them vertically against the wall. Examine them during the morning, at night, and under the kitchen lights you use most. A gray tile can turn blue beside warm cabinets, while an innocent-looking white sample can suddenly reveal that it is pink, yellow, or “dentist-office white.” Comparing samples beside the actual countertop is far more reliable than choosing from a phone screen. sure the Installation Area
Measure the width and height of each backsplash section, multiply them to calculate square footage, and add the sections together. Order extra material for cuts, breakage, pattern matching, and future repairs. Straight-set rectangular tile needs less overage than diagonal, herringbone, or intricate mosaic layouts.
Include adhesive, grout, caulk, trim, outlet extensions, spacers, sealers, blades, and delivery charges in the budget. The tile is the glamorous guest; the accessories are the relatives quietly consuming the catering fund.
Decide Where the Backsplash Will End
A backsplash needs deliberate boundaries. It might stop beneath upper cabinets, align with the outside edge of a cabinet bank, frame the range, or continue all the way to the ceiling. Avoid ending tile at a random location simply because the box ran out.
Use bullnose tile, pencil molding, metal profiles, finished-edge pieces, or another intentional treatment where exposed edges will remain visible. A well-planned ending can make an affordable backsplash look custom.
Choosing the Best Backsplash Material
Ceramic and Porcelain Tile
Glazed ceramic is a popular option because it is widely available, relatively affordable, and easy to wipe clean. Porcelain is denser and durable, although either material can work well when rated for wall installation.
Subway tile remains versatile rather than boring. It can be installed in a running bond, vertical stack, horizontal grid, herringbone, or basket-weave pattern. Elongated formats create a contemporary look, while handmade-look glazes provide subtle color variation. Larger tile also reduces the number of grout lines and helps the wall appear more continuous. ss and Metal
Glass tile reflects light and can brighten a dark kitchen. It is available in mosaics, larger formats, and continuous painted sheets. Because glass can reveal installation inconsistencies, the correct adhesive, clean cuts, and careful substrate preparation are especially important. nless steel complements commercial-style appliances and tolerates splatters well, although fingerprints will become part of the household. Copper, brass, and mirrored finishes offer more drama but may require specialized care or acceptance of a changing patina.
Natural Stone and Slab Backsplashes
Marble, limestone, travertine, and other natural stones offer genuine variation that printed imitations cannot perfectly reproduce. However, porous stone may require sealing, and acidic foods or harsh cleaners can damage sensitive materials.
Quartz, porcelain, granite, or matching countertop slabs create a continuous surface with very few grout lines. Although slab installation costs more and usually requires professional fabrication, it is appealing to homeowners who prefer easy cleaning and a calm, architectural appearance.
Peel-and-Stick Tile, Wallpaper, and Paint
Peel-and-stick backsplashes can refresh rentals, temporary kitchens, and modest budgets with less mess than traditional tile. Choose a product intended for kitchen use, check its heat limitations, and install it only on a clean, smooth, dry wall. Quality products should resist water, remain securely bonded, and tolerate normal daily cleaning. ting existing tile is another economical option when the old surface is firmly attached. Successful results depend on degreasing, sanding when required, applying a bonding primer, and using paint formulated for tile. Stencils can imitate encaustic patterns without the encaustic price tag. to Complete a Tile Backsplash Makeover
1. Prepare and Protect the Kitchen
Clear the countertops, protect nearby surfaces, move the range when possible, and switch off electrical power before removing outlet covers. Verify that the power is off rather than relying on optimism.
Remove grease, dust, wallpaper, loose paint, and raised adhesive. Repair torn drywall and sand obvious imperfections. Tile generally follows the plane of the substrate, so bumps and hollows may remain visible after installation. The wall should be clean, dry, flat, and structurally sound before work begins. Plan the Tile Layout
Find the most visible centerlines and dry-lay enough tile to determine where cuts will fall. Shift the pattern when necessary to avoid tiny slivers at cabinet edges, corners, and focal areas.
For a feature behind the range, center the pattern on the appliance or hood unless the architecture suggests another alignment. Use level reference lines because countertops and cabinets are not always perfectly level. A balanced layout with properly planned cuts is one of the clearest signs of professional-looking tile work. Set the Tile
Use an adhesive or mortar recommended for the tile, substrate, and installation area. Apply it in manageable sections so it does not dry before the tile is placed. Comb the material consistently with the correct notched trowel, press the tile firmly into position, and check alignment frequently.
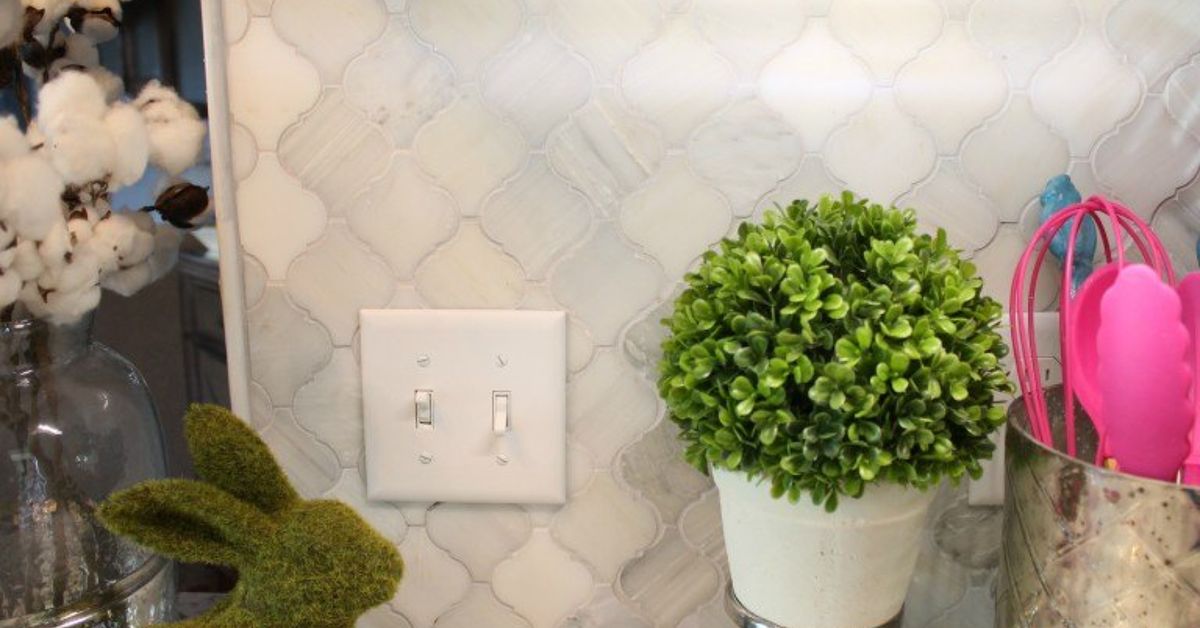
Clean adhesive from the joints before it hardens. Cuts around outlets should be accurate enough to remain hidden beneath the cover plates while leaving proper support. Electrical boxes may require approved extensions to account for the new wall thickness.
4. Grout and Caulk
After the setting material cures, apply grout diagonally across the joints with a rubber float. Remove the excess without washing the joints too deeply. When the grout begins to firm, wipe the tile with a damp sponge and remove the remaining haze later.
Use flexible caulk rather than hard grout where the backsplash meets the countertop and at other changes of plane. These surfaces can move independently, and flexible sealant is better able to accommodate that movement. Allow the Installation to Cure
Follow the manufacturers’ curing, sealing, and cleaning instructions. Do not push appliances against fresh work or celebrate with an immediate spaghetti-sauce stress test. Natural stone and some cementitious grout may require sealer, while glazed tile usually does not.
Budget-Friendly Backsplash Makeover Ideas
A makeover does not always require demolition. Sound tile can be deep-cleaned, regrouted, recolored, or painted. Replacing only an accent strip or installing a focal panel behind the range can also create a noticeable change with less material.
Another smart strategy is selecting a modest field tile and spending selectively on layout or trim. An inexpensive rectangular tile installed vertically with carefully coordinated grout can appear more custom than an expensive mosaic surrounded by awkward cuts.
Homeowners can also reduce costs by limiting decorative material to the sink or cooking zone. Concentrating a premium finish in a smaller area is a recognized way to control backsplash expenses without eliminating visual impact. professional installation, request a written scope covering demolition, wall repair, materials, edge treatments, outlets, grout, caulk, sealing, cleanup, and disposal. The lowest quote is not necessarily the least expensive when half the project later arrives disguised as surprise invoices.
Backsplash Design Ideas That Age Well
Warm White Tile
Warm white tile with matching grout supports wood cabinets, painted cabinetry, patterned counters, and changing decor. A slightly varied glaze keeps the surface from feeling flat.
Vertical Stacked Tile
A vertical grid visually lifts the wall and gives ordinary rectangular tile a more tailored appearance. It works especially well beneath low upper cabinets.
Color Behind the Range
Use saturated green, navy, blue, or terracotta tile behind the range and a quieter treatment elsewhere. Repeating that accent color in a rug, stool, or accessory makes the feature feel connected rather than dropped in by helicopter.
Full-Height Backsplash
Continuing tile or countertop material to the ceiling creates drama and avoids an awkward strip of painted wall. It works particularly well behind open shelves or a statement range hood.
Common Kitchen Backsplash Makeover Mistakes
The first mistake is choosing a backsplash in isolation. A charming patterned tile can turn chaotic beside a heavily veined counter. The second is failing to test grout color. Dark grout emphasizes every joint and alignment issue, while matching grout creates a calmer visual field.
Other problems include tiling over grease, skipping the dry layout, using tiny cuts at exposed edges, grouting changes of plane, forgetting outlet depth, and choosing a difficult-to-clean texture for a household that cooks frequently.
A basic running-bond backsplash on a flat wall is approachable for a careful DIYer. Fragile glass, large slabs, complicated patterns, damaged substrates, and uncertain electrical conditions may justify hiring a qualified installer. Professional tile organizations recommend choosing installers whose skills have been independently assessed for projects requiring specialized expertise. l-World Experiences from a Kitchen Backsplash Makeover
The most useful lesson from an actual backsplash project often arrives before the first tile is installed: samples are sneaky. In one typical makeover, a homeowner selected a pale gray ceramic tile under bright showroom lighting. At home, beside cream cabinets and warm LED bulbs, it looked distinctly lavender. The solution was not a more expensive product. It was a warmer off-white sample tested in the kitchen for two days. That small pause prevented years of wondering why the room resembled a very polite nursery.
Demolition provides another memorable lesson. Removing old tile appears wonderfully fast during the first few minutes. Then drywall paper tears, adhesive remains in stubborn ridges, and the planned one-day project develops a second act. Homeowners who expect to patch, sand, prime exposed drywall paper, and verify the wall’s flatness usually achieve a cleaner result than those who attempt to bury every defect beneath extra mortar.
Layout is where patience becomes visible. Starting a subway-tile installation at one end of the wall can produce an ugly half-inch strip at the opposite end. Dry-laying a row first allows the pattern to shift so both sides receive balanced cuts. Guests may never identify why the finished wall looks professional, but symmetry quietly does the work.
One homeowner learned this lesson while planning tile around a range hood. Centering the first tile on the wall seemed logical until the hood was measured. The wall, range, and hood were not perfectly aligned with one another. Centering the pattern on the hood produced a visually balanced result, even though the mathematical center of the wall was slightly different. In renovation work, the eye sometimes outranks the calculator.
Grout color can also change the personality of the same tile more than expected. Soft white grout makes white tile read as one calm surface. Medium gray outlines each piece and emphasizes the pattern. That contrast can look crisp when every joint is even, but it can also broadcast each wobble like a sports commentator. Creating a small sample board with spare tile and two grout colors may feel tedious for one evening, yet it can influence the appearance of the kitchen for years.
Another practical experience involves outlet covers. A backsplash can be beautifully installed and still look unfinished when switches and receptacles sit noticeably behind the new surface. Planning for the added tile thickness and using appropriate electrical box extensions produces a safer, cleaner result. This is also the stage when a straightforward DIY project may need assistance from a qualified electrician.
Cleaning habits deserve equal consideration. Someone who frequently fries food, sears meat, or simmers red sauce may be happier with smooth glazed tile, a slab surface, or darker coordinated grout than with deeply textured stone and bright white joints. A household that mainly reheats soup can take more liberties. The ideal material is not necessarily the one that wins the showroom beauty contest. It is the one that survives the household’s actual cooking routine.
The final experience is usually the most rewarding. Once the outlet covers return, the caulk line is smooth, and the under-cabinet lighting washes across the new surface, the room can feel renovated even though the cabinets and counters never moved. That is the unusual power of a backsplash makeover: it is a contained project with enough visual influence to make older elements appear newly chosen.
Conclusion
A successful kitchen backsplash makeover balances appearance, maintenance, installation quality, and daily use. Start with fixed elements such as the countertop and cabinets. Test physical samples, plan visible edges, prepare the wall carefully, and choose a material you are genuinely willing to clean.
Whether the final choice is ceramic tile, glass, natural stone, metal, a continuous slab, painted tile, or peel-and-stick panels, thoughtful execution matters more than chasing the latest trend. The backsplash should protect the wall, simplify cleanup, and look like it belongs in the kitchen. Achieve those goals, and the project has done far more than add a decorative surface.

