
Makeup
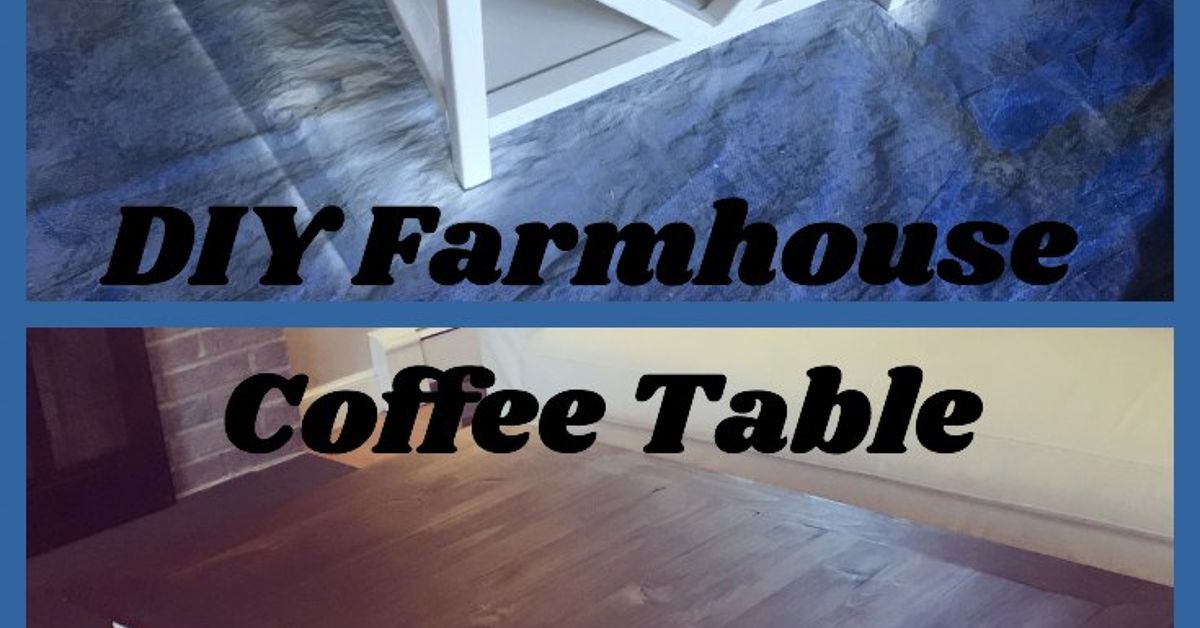
How to Build a DIY Farmhouse Coffee Table
Jun
A farmhouse coffee table is the living room’s unpaid intern: it holds your snacks, your remotes, your feet (no judgment), and somehow still gets blamed when someone spills a drink. The good news? You can build a sturdy, good-looking DIY farmhouse coffee table that feels “designer” without paying “designer” pricesor assembling something with 43 mystery bolts and a single Allen key forged in despair.
This guide walks you through a classic farmhouse build: chunky legs, a thick-looking top, clean lines, and an optional lower shelf for baskets (aka “where clutter goes to hide”). You’ll get a practical cut list, smart joinery options, finishing advice that actually holds up to real life, and a handful of “learn from other people’s mistakes” tipsbecause the only thing worse than a wobbly table is realizing the wobble is your fault.
Before You Start: Size It Like You Actually Live There
A farmhouse style coffee table looks best when it fits your seating area and your habits. If your living room is a “movie + snacks + board games” zone, you’ll want more surface area. If your space is tight, you’ll want better clearance so knees and shins don’t file formal complaints.
Simple sizing rules that work
- Height: Most coffee tables land around 16–18 inches tall. This typically pairs well with standard sofa seat heights.
- Distance from seating: Aim for about 14–18 inches between the sofa and the table so it’s easy to reach, but you can still walk.
- Length: A common guideline is about two-thirds the length of your sofa. Example: an 84-inch sofa pairs nicely with a ~56-inch table.
- Width: Many rectangular coffee tables end up around 22–30 inches wide depending on room depth and traffic paths.
For this tutorial, we’ll build a very “classic” farmhouse size: 48″ long × 24″ wide × ~17″ tall. That shape is roomy enough for real use, but not so big that it dominates the room.
Safety (Especially If You’re New)
If you’re under 18 or new to power tools, build this with a parent/guardian or an experienced adult. A farmhouse coffee table is supposed to be a weekend winnot a “why is the urgent care waiting room so bright?” story.
- Wear eye protection and hearing protection.
- Clamp boards before drilling/screwing (hands are not clamps).
- Read your tool manuals and follow the safety instructions for your saw, drill, and sander.
- If you don’t feel confident cutting lumber: have an adult do the cutting, or ask the store to cut boards to length.
Materials: Pick the Wood That Matches Your Expectations
“Farmhouse” can mean anything from rough-and-rustic to clean-and-modern. Your wood choice decides how the table ages.
Great beginner-friendly options
- Pine / SPF (spruce-pine-fir): Budget-friendly and easy to find. Softer, so it dents easier (which some people call “character”).
- Douglas fir: Often straighter and a bit tougher than basic pine, still affordable.
- Poplar: Paint-grade favorite. Smooth, stable, easy to work.
Upgrade options
- Oak / maple: More durable, takes a beating, heavier, pricier.
- “Reclaimed look” without reclaimed drama: Use new lumber and add texture with wire-brushing, light distressing, or layered stain.
Avoid pressure-treated lumber for indoor furniture. Choose straight, dry boards (look for “kiln-dried” when possible), and sight down the board length before buying to dodge the banana-shaped surprises.
Tools You’ll Need
- Measuring tape, pencil, speed square
- Miter saw or circular saw (for straight cuts)
- Drill/driver + bits
- Pocket hole jig (recommended) or alternative joinery (see below)
- Clamps (bar clamps or quick clamps help a lot)
- Orbital sander + sandpaper (80/120/180/220 grits are a solid set)
- Wood glue, wood filler
Joinery Options: How This Table Stays Solid
The farmhouse look is simple, but it should feel rock-solid when someone leans on it. Here are three realistic ways to build a strong base:
Option A (recommended): Pocket holes + glue
Pocket hole joinery is popular because it’s strong, quick, and beginner-friendly. Screws clamp the joint while glue cures, and the holes stay hidden on the inside faces. This is the method used in many modern DIY coffee table plans because it’s efficient and reliable.
Option B: Screws + hidden structure
You can build with carefully placed screws (pre-drilled) and glue, then hide fasteners where possible. It works, but pocket holes tend to look cleaner.
Option C: Dowels or mortise-and-tenon
Beautiful, traditional, and very strongalso more skill and tooling. If you’re comfortable with it, go for it. If not, pocket holes will still get you a table you’re proud of.
DIY Farmhouse Coffee Table Cut List (48″ × 24″ × ~17″)
Notes: (1) “2x” lumber sizes are nominal; actual thickness is typically 1.5″. A “2×6” is about 1.5″ × 5.5″. (2) If you have the store cut boards to length, label each piece immediately. Otherwise, you’ll play “guess that board” later.
Lumber (suggested)
- Top: 2×6 boards (or 1x boards if you prefer a thinner look)
- Base: 4×4 legs + 2×4 aprons/stretchers
- Optional shelf: 1×4 or 1×6 boards
Cut list table
| Part | Qty | Material | Cut Length | Purpose |
|---|---|---|---|---|
| Legs | 4 | 4×4 | 15 1/2″ | With a ~1 1/2″ top, yields ~17″ overall height |
| Long aprons (top frame) | 2 | 2×4 | 41″ | Runs between legs on the long sides |
| Short aprons (top frame) | 2 | 2×4 | 17″ | Runs between legs on the short sides |
| Lower stretchers (optional shelf support) | 2 | 2×4 | 41″ | Support for a lower shelf / extra rigidity |
| Lower stretchers (optional shelf support) | 2 | 2×4 | 17″ | Support for a lower shelf / extra rigidity |
| Top boards | 4 | 2×6 | 48″ | Edge-joined to make a ~22″ wide top (adjust as desired) |
| Shelf boards (optional) | 4–6 | 1×4 or 1×6 | 41″ | Spaced evenly or tight-fit for storage shelf |
Want a wider top? Use five 2×6 boards. Want a thinner top? Use 1×6 boards and add a thicker-looking edge detail by wrapping with 1×2 trim.
Step-by-Step Build
Step 1: Prep and pre-sand your boards
Lightly sanding before assembly is a cheat code for sanity. Hit broad faces with 120 grit to remove mill glaze, then 180. Don’t chase perfection yet. Just get things clean and smooth enough that glue squeeze-out won’t bond to fuzzy fibers like it’s paying rent.
Step 2: Build the tabletop panel
Lay your top boards side-by-side and choose the best-looking faces for the top surface. Alternate the growth rings (the curve of the grain on the end) in opposite directions to help reduce cupping over time.
- Arrange boards to get the best grain flow and color match.
- Apply wood glue along edges.
- Clamp across the width until glue squeezes out along the seam.
- If using pocket holes for the top: drill pocket holes along the underside edge of alternating boards, then screw boards together while clamped.
- Let the panel cure, then scrape/sand dried glue squeeze-out.
Pro move: If boards aren’t perfectly flat, clamp first, then add screws. Screws are not magical straightenersjust determined little fasteners.
Step 3: Build the base frame (aprons + legs)
The base is essentially a rectangle (aprons) supported by four legs. Pocket holes go on the inside faces so nothing shows from the outside.
- Cut legs to length.
- Drill pocket holes in the ends of the apron boards (long and short).
- Attach aprons to legs using glue + pocket hole screws, keeping everything square.
- Repeat until you have a full “box” frame.
Square check tip: Measure diagonals corner-to-corner. If both diagonals match, your frame is square. If not, gently clamp and nudge until it behaves.
Step 4 (optional but recommended): Add lower stretchers for strength and a shelf
A lower shelf makes the table more functional and can add rigidity. Place lower stretchers a few inches above the floor (commonly 3–5 inches) or higher if you want taller baskets underneath.
- Mark consistent stretcher height on all legs.
- Drill pocket holes in stretcher ends.
- Attach stretchers to legs with glue + screws.
Step 5: Add the shelf boards (optional)
You can lay shelf boards tight together for a solid shelf, or leave small, even gaps for a lighter look. Attach boards from underneath through the stretchers so fasteners stay hidden.
Step 6: Final sanding (the “finish decides everything” phase)
Sand the entire build progressively: 120 → 180 → 220. Round over sharp edges slightly (even a small chamfer or soft edge helps). Your shins will thank you later.
Finishing Like a Grown-Up (Even If You’re Not One Yet)
Farmhouse finishes usually land in one of three camps: (1) stained wood + clear coat, (2) painted base + stained top, or (3) distressed “reclaimed” look. The best finish is the one that matches your life. If you have kids, pets, or a habit of putting sweaty iced drinks directly on wood (bold choice), prioritize durability.
Finish option 1: Stain + protective topcoat (durable and classic)
- Condition softwood (optional but helpful): Pine can blotch. A pre-stain conditioner or a thin “wash coat” can help even it out.
- Stain: Apply with a rag or brush, wipe off excess, let dry.
- Topcoat: Apply multiple thin coats of polyurethane or a water-based protective finish.
- Between coats: Lightly sand to knock down dust nibs and keep coats smooth.
Thin coats beat thick coats. Thick coats look tempting… right up until they drip, wrinkle, and make you say words your furniture shouldn’t hear.
Finish option 2: Painted base + stained top (farmhouse favorite)
Paint the base a soft white, warm greige, black, or muted green, then stain the top. Seal both. This gives you the farmhouse contrast without looking like a “wood store accident.”
Finish option 3: Distressed / faux reclaimed
Distressing works best when it’s subtle. Focus wear on corners and edges where real life would naturally hit. Add texture with a wire brush along the grain, then stain or glaze, then seal. The seal is what makes “rustic” still feel clean and usable.
Attach the Top Without Creating Future Problems
Wood expands and contracts across the grain as seasons change. If you lock the top down too aggressively, you can invite cracking or warping later. A safe approach is using tabletop fasteners (like figure-8s or Z-clips), or using screws through slightly elongated holes in the apron so the top can move.
Simple attachment method
- Center the base on the underside of the top.
- Pre-drill holes through the apron into the top (don’t drill all the way through!).
- If possible, elongate the holes in the apron (side-to-side direction) to allow seasonal movement.
- Screw the base to the top snugly, not insanely tight.
Common Upgrades (If You Want “Custom” Without the Chaos)
Add a thicker-looking top
If you want a chunky top without buying thick slabs, wrap the perimeter with 1×2 trim to fake a thicker edge profile. It’s a visual upgrade with a modest budget.
Add a bottom shelf that actually works
If you plan to store baskets, measure the basket height and width first. Then position your lower stretchers so baskets slide in without snagging. “I’ll just eyeball it” is how baskets become permanent decor.
Choose a finish sheen that fits farmhouse style
Matte and satin usually feel more farmhouse than high gloss. Gloss shows fingerprints, swirl marks, and every crumb like it’s a detective.
Farmhouse Coffee Table FAQ
How much does it cost to build a DIY farmhouse coffee table?
Costs vary by wood type and region, but many builds land somewhere between budget-friendly softwood and mid-range hardwood pricing. If you already have tools, your biggest costs are lumber, screws, glue, and finish.
How long does it take?
Building can be done in a day, but finishing often takes longer because drying and curing matter. Plan for a weekend if you want a durable topcoat.
Do I really need a pocket hole jig?
You can build without one, but pocket holes make it easier to get strong joints with clean-looking resultsespecially for beginners.
What’s the most durable topcoat for a coffee table?
A properly applied polyurethane system is a popular choice for tabletops because it protects against moisture and wear. Multiple thin coats and light sanding between coats help the finish level and feel smooth.
Experience-Based Notes: What DIYers Usually Learn the Hard Way (So You Don’t Have To)
The internet makes farmhouse coffee tables look like a magical “cut wood → table appears” situation. Real life is slightly messier, and that’s normal. Here are some common, experience-based lessons DIYers report after building their first farmhouse coffee tableplus what to do about them.
1) Lumber selection matters more than fancy tools
Many first-time builders assume any board labeled “2×6” is basically identical. Then they get home, lay boards on the floor, and realize two of them are shaped like they’ve been storing secrets. The fix is simple: take your time at the store. Sight down each board like you’re aiming a pool cue. Check for twist (one corner lifting), bow (banana curve), and cup (smile shape). Pick the straightest boards for the tabletop especiallybecause a warped top is the one thing you’ll notice every single day. If you can’t find perfect boards, choose the best ones and plan to sand/level after glue-up.
2) Glue-ups are where confidence goes to get humbled
A tabletop glue-up feels calm until the clamps go on and boards start sliding like they’re trying to escape. This is why “dry fitting” is a real skill: lay boards out, position clamps, and rehearse the steps before you add glue. When it’s go-time, use enough clamps to pull seams tight, but don’t crank so hard you create a new shape. Wipe or scrape squeeze-out before it fully hardens. Also: don’t rush this stage. If you’re building with friends or family, this is the moment to assign rolesone person aligns boards, another tightens clamps, another wipes glue. It turns chaos into something that resembles a plan.
3) Pocket holes are friendly… until you forget the “square” part
Pocket hole joinery is beginner-friendly, but it won’t automatically keep your frame square. DIYers often discover a tiny twist when the base rocks on the floor: one leg isn’t perfectly aligned, or the apron was attached while slightly out of square. Two fixes: (a) measure diagonals while assembling to confirm the frame is square, and (b) build on a flat surface (a workbench, not a lumpy patio paver). If you still end up with a wobble, don’t panic. Often, the wobble is minor and disappears once the top is attached. If it doesn’t, adjustable furniture glides can save the day without looking like a band-aid.
4) Pine stain blotching is realand it’s not your fault
Pine can absorb stain unevenly, creating dark patches that look like coffee rings from the future. DIYers usually learn this lesson after the first coat and a few seconds of “oh no.” The best prevention is a test board: use an offcut from your top and try your stain + topcoat process before committing. If you want a more even look, consider a pre-stain conditioner, a wash coat, or a gel stain (which can sit more on the surface). And if your stain still looks uneven? A second light coat or a toner-style approach (tinted topcoat) can help blend thingsjust keep it subtle.
5) The finish feels “dry” before it’s actually ready for real life
A freshly finished coffee table is tempting. It’s right there. It looks gorgeous. Your brain says, “Surely I can put a cup here.” But many DIYers discover that a finish can be dry-to-touch while still curing. That’s when you get the infamous “mystery cup ring” or a soft dent that never fully forgives you. The fix: let the final coat cure longer than you thinkespecially for a tabletop. Use coasters for the first couple weeks like you’re trying to impress a very judgmental interior designer.
If you remember nothing else: choose straight boards, square your frame, test your finish, and give the topcoat time. Do that, and your DIY farmhouse coffee table won’t just look good in photosit’ll survive actual living.
